Garage Door Manual Handle: A Step-by-Step Guide to Fix, Inspect, and Maintain
A comprehensive, step-by-step guide to diagnose, repair, and maintain your garage door manual handle for safe, reliable operation. Learn hardware types, safety precautions, troubleshooting, and replacement tips with practical checklists.

By following this guide, you will diagnose, maintain, and safely operate your garage door manual handle, ensuring smooth operation and reliable access. You’ll learn how to inspect for wear, tighten fasteners, and replace a damaged handle without specialized tools. This quick answer sets the stage for a deeper, step-by-step breakdown with safety notes from GarageDoorAdjust.
Understanding the garage door manual handle and why it matters
The garage door manual handle is the pivotal grip you use when you need to operate the door without relying on an electric opener. A solid handle and secure mounting ensure predictable, safe operation, especially during power outages or opener failures. When the handle is loose or worn, you may notice increased effort, binding, or misalignment that makes the door difficult to open or close. Regular inspection reduces the risk of occupational strain or accidental door movement. According to GarageDoorAdjust, a well-maintained manual handle contributes to safer, more reliable operation and longer door life. This is not just about convenience; it is a safety feature that homeowners should monitor as part of routine maintenance. GarageDoorAdjust analysis shows that homeowners who perform basic handle checks save time during emergencies and avoid needless wear on hinge joints and tracks.
In most homes, the manual handle is mounted on the door or a nearby interior frame. It should feel sturdy, operate without excessive play, and align with a companion latch or catch. If the handle wobbles, if screws are stripped, or if the lever binds when pulled, you have early warning signs to address before more serious failures develop.
This section lays the groundwork for practical checks, using clear steps that can be completed with common hand tools. The goal is safe, confident operation and a door that behaves consistently, whether or not the power is on. GarageDoorAdjust emphasizes that prevention is cheaper than repair and safer than improvisation in a pinch.
Common issues include loose mounting screws, corroded or bent handles, misaligned latches, and dry, squeaky pivot points. Addressing these early can prevent bigger problems like track binding or spring related imbalances. Keeping a simple maintenance routine—tightening fasteners, cleaning debris, and applying a light lubricant—goes a long way toward extending the life of the entire door system.
-1
Tools & Materials
- Safety equipment (safety glasses, gloves)(Protect eyes and hands during inspection and minor disassembly.)
- Phillips head screwdriver(Use the correct size to avoid stripping screws.)
- Flathead screwdriver(Useful for prying and aligning components without damage.)
- Adjustable wrench(Hold nuts or bolts if they don’t thread by hand.)
- Pliers(Grip and remove stubborn fasteners; avoid slippage.)
- Lubricant spray (silicone-based)(Lubricate hinges and pivot points; avoid oil-heavy products on plastic parts.)
- Cleaning cloth(Wipe away dust and old lubricant before applying fresh product.)
- Replacement manual handle assembly(Optional if the existing handle is damaged beyond repair.)
Steps
Estimated time: 25-40 minutes
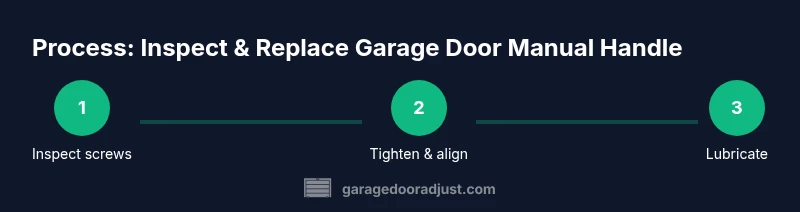
- 1
Turn off power and secure the door
Power down the garage door opener from the remote and the wall switch to prevent accidental movement while you work. If possible, disconnect the opener's power source or unplug it from the outlet. This reduces the risk of injury from a suddenly moving door, especially when you’re near the tracks and springs.
Tip: Lock the opener switch in the OFF position and keep children away from the work area. - 2
Inspect mounting screws and handle hardware
Visually inspect all screws, bolts, and the handle mounting plate. Check for stripped threads, corrosion, or bent components. Loose fasteners are a leading cause of handle failure and door misalignment.
Tip: If a screw won’t tighten, replace the fastener with a compatible size and material to avoid future loosening. - 3
Check linkage, latch, and track alignment
Ensure the handle interacts smoothly with the latch mechanism and that adjacent tracks and hinges aren’t bent or misaligned. Misalignment can increase effort and cause premature wear on the door’s balance system.
Tip: Use a level or straight edge to verify track alignment before reassembly. - 4
Lubricate pivot points and hinge areas
Apply a light silicone-based lubricant to pivot points, latch interfaces, and any moving metal on the handle. Wipe away excess to prevent dust accumulation and ensure smooth operation.
Tip: Avoid over-lubricating; a thin film is enough to reduce friction without attracting debris. - 5
Repair or replace damaged handle components
If the handle shows cracks, rigidity, or significant wear, replace it with a compatible model. Ensure mounting holes line up with the original footprint to avoid drilling new holes in the door.
Tip: Keep the old screws in a labeled tray during replacement to prevent mixing hardware. - 6
Test manual operation and finalize setup
After reassembly, manually operate the door a few times to confirm smooth action and proper latch engagement. Reconnect power and test with the opener at a low test run, ensuring the door stops safely and returns to its resting position.
Tip: Observe for unusual noises, binding, or resistance during the test.
Got Questions?
What is a garage door manual handle and why is it important?
The manual handle is the grip that allows you to operate the door manually when the power is out or the opener fails. It’s critical for safe access and should be checked regularly for looseness or wear.
The manual handle is the grip that lets you open the door by hand when power isn’t available. Check it for looseness or wear to stay safe.
Can I fix a loose handle myself without professional help?
Yes, if you have basic tools and follow safety steps. Start by tightening mounting screws, inspecting for stripped threads, and ensuring the handle engages the latch correctly.
Yes, you can, as long as you follow the safety steps and tighten the screws properly.
When should the manual handle be replaced?
Replace the handle if it shows cracks, corrosion, severe wear, or if tightening does not restore solid operation. A damaged handle can impair safety and door balance.
Replace the handle if it’s cracked or won’t stay secure after tightening.
What maintenance helps extend the life of the manual handle?
Regular cleaning, light lubrication of pivot points, and periodic inspection of screws and mountings help prevent failure and keep the door operating smoothly.
Clean, lubricate lightly, and check the screws regularly to extend life.
Is lubrication safe for all manual handles?
Use silicone-based or light lubricant designed for metal parts. Avoid petroleum-based products on certain plastics and seals to prevent damage.
Lubricate with silicone-based products and avoid heavy oils on plastics.
Do I need a pro for handle replacement if the door is unbalanced?
If the door balance is off or you’re uncomfortable with the replacement process, a professional should handle it to prevent harm or further damage.
If the door isn’t balanced or you’re unsure, call a professional.
Watch Video
Quick Summary
- Inspect handle mounting and latch alignment regularly
- Use compatible replacement parts to avoid fit issues
- Lubricate pivot points to maintain smooth operation
- Do not operate the door with power on during maintenance
- If you’re unsure about alignment or safety, consult a professional