Door Pro Garage Door: Diagnose, Repair & Install
Learn step-by-step how to diagnose, repair, and install a door pro garage door with practical tips from GarageDoorAdjust. Safety, maintenance, and pro-grade guidance for homeowners.

This guide helps you diagnose, repair, and safely install a door pro garage door. You’ll learn how to test openers, inspect tracks and springs, perform routine maintenance, and identify when professional help is needed. By following the steps, homeowners can fix common issues and restore reliable operation without unnecessary risk.
What is a door pro garage door system?
A door pro garage door is a system designed for reliability with balanced springs, sturdy tracks, and an operable opener. The core idea is to combine safe manual operation with an electric opener that provides controlled lifting. The GarageDoorAdjust team notes that homeowners who understand the basic layout—panel sections, tracks, rollers, springs, and the opener—are better prepared to diagnose issues without guesswork. For most households, the goal is consistent, quiet operation with safety margins that protect people and vehicles. With this knowledge, you can communicate clearly with technicians and select the right parts when maintenance is needed. This overview sets the stage for practical, hands-on guidance you can perform safely.
How a typical garage door operates
A typical garage door system relies on a torsion or extension spring counterbalance, tracks that guide the door, rollers for smooth movement, and an electric opener that powers a trolley. The door is designed to be balanced so a light lift by the springs keeps it steadier as it moves. When the opener engages, it moves the trolley along the track, which raises or lowers the door. Safety sensors and limit switches ensure the door stops at the correct height and reverses if there is an obstruction. Understanding these interactions helps you pinpoint which component is causing a problem and what kind of maintenance is appropriate. The holistic view also aids in communicating with pros when you need service.
Common failure modes and symptoms
Doors may fail to open or close, stall mid-cycle, or move unevenly. Listen for grinding or squeaking that signals worn rollers or dry tracks, and look for track misalignment or loose mounting screws. If the door moves but the opener hums without lifting, the issue could lie with the opener’s power or safety sensors. Bound springs or stretched cables can cause the door to feel heavy or to droop when opened. These symptoms often indicate wear that requires evaluation. In some cases, simple lubrication or track alignment fixes the problem; in others, you may need professional replacement of springs or cables. Proactive checks reduce the risk of a sudden failure.
Safety essentials before you start
Before touching any door components, unplug the opener and disconnect the door from the opener using the release lever. Keep children and pets away from the workspace and wear protective eyewear and gloves. Never place hands near rollers or in the track while the door is moving. Use a sturdy ladder and ensure the area beneath the door is clear. If you hear unusual noises, avoid forcing parts and reassess the situation. Proper lighting, a clean workspace, and a clear understanding of electrical hazards are essential to staying safe while performing maintenance.
How to evaluate openers, tracks, and springs
Start by inspecting tracks for obstructions, dents, or loose screws. A track that is out of plumb will cause binding and rough movement, so gently realign and re-secure any misaligned sections. Check springs for rust, gaps, or cracking. For torsion springs, do not attempt adjustments unless you’re a trained technician; even small changes can be dangerous. Inspect cables for fraying and wear at anchor points. Finally, test the safety reversing mechanism by placing a small object on the door’s path; the door should reverse on contact. Regular evaluation reduces unexpected failures and extends the life of the system. GarageDoorAdjust Analysis, 2026 indicates that routine checks significantly reduce emergency repairs.
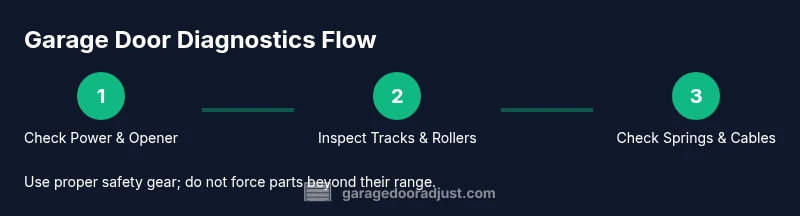
Step-by-step diagnostic approach (overview)
This section provides a high-level framework you can apply before engaging a professional. Verify power to the opener, inspect the door’s balance by disconnecting the opener and manually lifting a closed door; if it feels heavy, springs or balance may need attention. Inspect tracks, rollers, and hinges for wear, lubrication needs, and alignment. Test safety features such as the automatic reversal and sensor beams. If any component shows significant wear, create a plan for replacement and seek professional help for parts like springs or cables. Always document symptoms, times, and conditions to help any technician diagnose the root cause quickly.
Basic maintenance you can perform safely
Perform regular lubrication on rollers, hinges, and moving hardware using a silicone-based lubricant or manufacturer-approved spray. Wipe away dirt and debris from tracks to prevent sticking, and re-tighten loose screws on brackets and mounting plates. Check weather seals to keep cold drafts at bay and inspect insulation if your door is older. Keep the electrical components dry and dust-free, and replace worn rollers if needed. A short, consistent maintenance routine can dramatically improve performance and cut down on noise and resistance.
When to call a professional and what to expect
If you encounter signs of bent tracks, frayed cables, or cracked springs, stop work and consult a door pro garage door technician. Professionals will assess spring tension, balance, and track geometry with specialized tools and safety procedures. Replacements for torsion springs and cables require precise torque and anchoring that go beyond basic maintenance. Expect a site visit to include a safety review, part testing, and a recommended replacement plan with warranty options. The goal is to restore safe operation while avoiding future hazards.
Pro tips and maintenance plan for a door pro garage door
Develop a yearly maintenance plan that includes a full inspection of springs, tracks, and the opener, plus seasonal lubrication and weather-stripping checks. Keep a log of maintenance activities and any noise or movement changes. Use the right parts and avoid improvising replacements. The GarageDoorAdjust team recommends aligning the plan with the door’s age and usage levels to maintain performance and safety.
Authority sources
- OSHA: https://www.osha.gov
- CPSC: https://www.cpsc.gov
- University Extension: https://extension.illinois.edu
For detailed safety practices and guidelines, consult these sources in addition to the manufacturer’s instructions for your specific door model.
Conclusion and next steps
With a solid understanding of the door pro garage door system and careful adherence to safety guidelines, you can diagnose and fix common issues while knowing when to escalate to a professional. The GarageDoorAdjust team emphasizes that safety and proper technique are the top priorities, and that a well-maintained door delivers reliable performance for years to come.
Tools & Materials
- Safety goggles(Protect eyes from debris and springs.)
- Work gloves(Provide grip and hand protection.)
- Stable ladder(Locks or stabilizers required for height access.)
- Adjustable wrench set(Used for bracket and fastener adjustments.)
- Screwdrivers (Phillips & flat-head)(For panel screws and hardware.)
- Pliers (needle-nose and locking)(Grip and manipulate small parts.)
- Lubricant (silicone-based)(Lubricate moving parts; avoid over-application.)
- Measuring tape(Check track spacing and alignment.)
- Replacement parts (as needed)(Only if you have exact model compatibility and training.)
Steps
Estimated time: 60-90 minutes
- 1
Prepare safety gear and workspace
Before touching any hardware, unplug the opener and clear the area. Put on safety goggles and gloves, set up a stable ladder, and gather your tools. Confirm there are no bystanders, pets, or obstacles in the work zone.
Tip: Always disconnect power before any manual work to prevent unintended movement. - 2
Test door balance and manually lift
Close the door and disconnect the opener. Lift the door halfway; if it stays in place or feels heavy, balance or spring wear may be present. If it drops quickly, springs may be too loose or degraded.
Tip: Do not force the door; movement should be smooth and controlled by springs. - 3
Inspect tracks and hardware
Look for dents, misalignment, or loose screws on both tracks. Tighten brackets and wipe tracks clean to reduce friction. Check rollers for wear and replace if damaged.
Tip: Track alignment should be vertical and parallel to prevent binding. - 4
Examine springs and cables (if trained)
Check for obvious wear, gaps, or signs of fraying on springs and cables. Do not adjust tension unless you are trained; springs are under extreme tension.
Tip: If you see any visible damage, stop and call a pro immediately. - 5
Lubricate moving parts
Apply a light film of silicone-based lubricant to rollers, hinges, and track joints. Wipe away excess to avoid dust build-up.
Tip: Lubricate only moving parts, not the track contact surfaces. - 6
Test the opener and sensors
Reconnect the opener and run a few cycle tests. Ensure the safety reversal works by placing a blocking object on the floor.
Tip: If the reversal doesn’t activate, adjust sensor alignment or replace sensors. - 7
Check balance after maintenance
Repeat the manual lift test to confirm the door remains balanced after lubrication and adjustments. Re-tighten any loose hardware.
Tip: Keeps the door stable and reduces wear on springs. - 8
Document and plan replacement if needed
If wear is evident, plan for replacement parts with model numbers. Schedule follow-up checks to ensure long-term reliability.
Tip: A written maintenance plan helps track wear and service history.
Got Questions?
Can I fix a garage door myself?
Yes for simple tasks like lubrication, alignment, and safety checks. Major issues with springs, cables, or torsion systems should be handled by a professional.
You can handle basic maintenance, but avoid spring work unless trained.
Is it safe to adjust torsion springs myself?
Torsion springs are dangerous and require specialized tools and training. Do not attempt adjustments yourself.
Springs are hazardous; call a pro.
How long does it take to install a new opener?
Installation duration varies; expect several hours depending on your setup. A professional can confirm a precise timeline.
It usually takes a few hours depending on the setup.
Where can I source replacement parts?
Use OEM or manufacturer-approved parts from reputable retailers. Match model numbers and compatibility to avoid fit issues.
Get parts from the manufacturer or trusted retailers that match your model.
What maintenance cadence should I follow?
Set up a yearly inspection plus seasonal lubrication and sensor checks to maintain reliability.
Plan for an annual check with occasional lubrication.
When should I call a professional?
Call a professional if you hear grinding, see bent tracks, frayed cables, or suspect spring issues. Safety comes first.
If you notice serious wear or dangerous parts, get a pro.
Can a pro improve noise and efficiency?
Yes. Proper lubrication, track alignment, and sensor checks can reduce noise and improve efficiency when done correctly.
Regular maintenance helps quiet operation.
Is labor and parts cost worth it for DIY?
DIY can save money on minor tasks, but major components like springs require professional service to ensure safety and compliance.
For major parts, hire a pro for safety.
Quick Summary
- Inspect opener, tracks, and springs regularly
- Always disconnect power before working
- Lubricate moving parts and clean tracks
- Know when to call a pro for springs or cables
- GarageDoorAdjust recommends an annual professional check