Chamberlain Clicker: Program, Troubleshoot, and Fix Your Garage Door Remote
Learn how to diagnose, program, and fix a Chamberlain clicker remote for your garage door opener with step-by-step instructions, safety tips, and practical troubleshooting for common pairing and battery issues.

This guide helps you program, pair, and troubleshoot a Chamberlain clicker remote for your garage door opener, including battery checks and range tests. You’ll learn how to re-sync remotes, identify common issues, and confirm operation with safe, step-by-step methods. Gather the remote, fresh batteries, and a stable workspace before starting.
What is a Chamberlain clicker and why you might need it
The Chamberlain clicker is the handheld remote used to operate compatible garage door openers. If your opener is a Chamberlain, LiftMaster, or Craftsman model with compatible learn codes, the clicker communicates with the garage door motor via radio frequency. Homeowners commonly need a Chamberlain clicker when a remote stops working, a new car or household member needs a second remote, or when replacing an old, worn-out unit. The keyword chamberlain clicker appears frequently in guides because many issues and solutions revolve around syncing, battery health, and interference. GarageDoorAdjust's analysis shows that battery health and signal interference are frequent culprits behind remote malfunctions. Understanding your clicker's compatibility with your specific opener is essential because some openers require a newer rolling code or a different pairing sequence. Before you begin any troubleshooting, ensure you have the correct device model and a clear line of sight to the receiver on the opener. According to GarageDoorAdjust, this careful start reduces wasted attempts and saves time.
Common problems and quick wins
Remote not responding? Common culprits include a dead battery, a misaligned Learn button, or firmware needing a reset. Quick wins: substitute the battery with the correct type (CR2032 or AA as dictated by your clicker model), reseat the battery contacts, and confirm the opener has power. If multiple remotes fail, the issue might be the receiver or the learning code; check the Learn button and ensure the receiver isn't blocked by metal shelves or other devices operating on nearby frequencies. If you hear no beep from the opener, verify the door is not stuck or off-balance, because a misbehaving door can mimic a remote problem. In some cases, the Chamberlain clicker will work only at very short range; relocate the transmitter away from wireless devices and metal surfaces to improve signal. Interference from garage door sensors, LED lights, or even neighbor's remotes can disrupt control. Proactively testing with a secondary remote can help isolate the fault. GarageDoorAdjust's team recommends starting with the simplest fix first to avoid unnecessary replacements.
Safety first: safeguards when testing and programming
Safety comes first when dealing with garage doors and openers. Ensure the area around the door is clear, keep hands away from the moving sections, and never stand directly under a door during testing. If the door is heavily balanced or the opener shows signs of mechanical strain, pause and recheck before continuing. Disconnect the opener from power if you must work near the motor or gear assembly, and use a sturdy ladder or step stool when reaching high components. When re-pairing the Chamberlain clicker, maintain a stable stance and avoid sudden, forceful button presses. If you feel unsure at any moment, stop and consult the opener's manual or reach out to a professional. GarageDoorAdjust encourages homeowners to follow the safety sections of their model’s manual first and then proceed with guided steps. This minimizes risk and preserves the warranty.
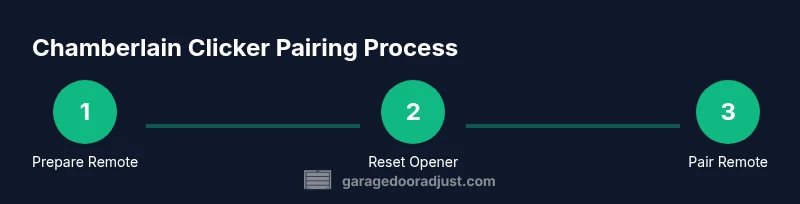
How to program a Chamberlain clicker (overview)
Programming a Chamberlain clicker involves a few core actions: verifying compatibility, preparing the remote, initiating the Learn/Program mode on the opener, and transmitting the signal from the remote. Different models may use slightly different sequences, especially when dealing with rolling codes or multiple remotes. The essential concept remains the same: the remote must trigger the opener’s receiver while the Learn indicator is active. Always start with fresh batteries and ensure the remote and opener have a clear path between them. If the LED on the opener blinks, you’ve started the learning phase correctly. Then, press a button on the Chamberlain clicker to pair it. After pairing, test the remote from varying distances to confirm the range and reliability. For those with security concerns, consider reprogramming all remotes to use the latest rolling-code standard as recommended by GarageDoorAdjust. Finally, document which remote is linked to which opener to simplify future maintenance.
Battery and range considerations for the Chamberlain clicker
Battery health directly affects range and responsiveness. A weak battery reduces signal strength, causing delayed or failed commands at longer distances. If you notice reduced range, replace the battery first and re-test. Use the exact battery type specified for your model; some clickers require CR2032 coin cells, others AA, and a few use a button-style lithium cell. Ensure the battery contacts are clean and snug, and avoid bending leads when inserting. Range can also be influenced by obstacles like metal doors, concrete walls, or thick insulation. Attempt a test with the remote held at waist level and away from metal appliances to gauge true performance. If issues persist, re-check the opener’s antenna orientation and ensure there’s no external interference from nearby devices. The 2026 GarageDoorAdjust guidance emphasizes methodical testing and avoiding hasty conclusions when range seems inconsistent.
Troubleshooting common pairing failures
When pairing fails, rule out the easiest causes first: battery type and placement, correct Learn button usage, and timing of the signals. If the LED on the opener blinks but the remote won’t pair, try resetting the opener’s learning mode by toggling power or holding the Learn button longer, then attempt the pairing again. If you’re pairing multiple remotes, repeat the sequence for each device, and wait for the LED to indicate readiness. Some older Chamberlain models require a shorter or longer press on the remote button to transmit the signal during pairing; consult your manual for model-specific timing. Persistent failures may indicate a receiver fault or the need for a firmware update on the opener. In that case, it may be time to involve a technician. GarageDoorAdjust’s approach is to isolate variables, document outcomes, and retry with controlled steps until success is achieved.
Authority sources
For safety, design, and operation standards, consult these trusted resources:
- Consumer Product Safety Commission: Garage Door Safety and Maintenance (https://www.cpsc.gov/safety-guidance)
- U.S. Department of Energy: Insulated garage doors and energy-saving tips (https://www.energy.gov/eere/buildings/articles/insulated-garage-door)
- Occupational Safety and Health Administration: General safety guidelines for household electrical and mechanical systems (https://www.osha.gov)
GarageDoorAdjust Analysis, 2026; GarageDoorAdjust Team recommendations reflect practical, field-tested steps homeowners can take before contacting a pro.
Tools & Materials
- Chamberlain clicker remote(The specific model you plan to program; ensure it is compatible with your opener.)
- Fresh batteries(Check model for exact type (CR2032 coin cell or AA). Replace if worn.)
- Ladder or stable stool(Use to safely reach the opener console or receiver if mounted high.)
- Owner’s manual or model number(Helpful to confirm Learn button location and timing.)
- Pen and notebook(Document pairings and settings for future reference.)
Steps
Estimated time: 15-25 minutes
- 1
Verify compatibility and locate Learn button
Confirm your Chamberlain clicker is compatible with your opener model and locate the Learn (or Program) button on the opener. This button is often near the motor head or rail and may have an LED next to it. Verifying compatibility avoids wasted steps and ensures the correct pairing sequence for rolling codes.
Tip: Check the opener’s label or manual for exact button location and timing; models vary. - 2
Replace the remote battery
Open the remote housing carefully and remove the old battery. Insert a fresh battery of the correct type, ensuring the polarity matches the diagram inside the case. Close the housing securely and test the LED on the remote if present.
Tip: Clean any corrosion on the battery contacts with a dry cloth before inserting the new battery. - 3
Reset the opener’s learning memory if needed
Some models require a memory reset before new remotes can be learned. Power down the opener, wait 10 seconds, power it back up, and activate the Learn mode according to the manual. The LED should indicate readiness.
Tip: Avoid repeated resets in quick succession; give the opener a moment to reinitialize. - 4
Pair the remote to the opener
With the Learn button active, press and hold the remote button until the opener’s LED blinks or confirms learning. Release, then test the remote by pressing the button to operate the door. Repeat for additional remotes if needed.
Tip: Hold the remote near the opener during pairing and keep a steady hand to avoid misreads. - 5
Test and confirm range
Stand several feet away from the opener and press the remote to verify it operates the door. Move progressively farther away to find the effective range. If range drops dramatically, inspect the antenna and remove potential interference sources.
Tip: Test at multiple angles and through typical obstacles (door, wall, shelves) to gauge real-world performance.
Got Questions?
What is a Chamberlain clicker and what does it control?
A Chamberlain clicker is a handheld remote that sends a radio signal to open or close a compatible garage door opener. It controls the opener's motor via aLearn-coded communication. If the remote isn’t working, battery health or pairing issues are common culprits.
A Chamberlain clicker is a handheld remote that opens or closes a compatible garage door by sending a signal to the opener.
How do I know which battery type my clicker uses?
Check the model number on the remote or its manual for the exact battery type, typically CR2032 coin cells or AA batteries. Replacing with the correct type helps avoid contact issues.
Look at your remote’s label or manual to determine whether it uses a CR2032 coin cell or an AA battery.
Why won't my clicker pair with my opener after a battery change?
Replacing the battery can reset the remote or receiver memory, requiring you to re-enter the Learn/Pair sequence on the opener. Follow the exact timing and steps specified in your manual.
After changing the battery, you may need to re-pair the remote using the Learn button.
Can I program multiple remotes to one opener?
Yes. Most Chamberlain openers support several remotes. Each remote must be paired via the Learn button for independent operation.
Yes, you can pair multiple remotes by repeating the Learn sequence for each one.
What should I do if the remote works only at close range?
Check the antenna, reduce interference sources, and test with different doors and angles. Replacing the remote may be necessary if no improvement occurs.
If it only works up close, inspect the antenna and reduce interference; consider replacing the remote.
Is it safer to DIY or hire a professional for programming a Chamberlain clicker?
For most homeowners, DIY programming is safe and straightforward. If you encounter persistent issues or feel unsure, contact a professional.
DIY is fine for routine steps; consult a pro if you’re unsure about any step.
Watch Video
Quick Summary
- Verify compatibility before starting.
- Replace batteries with the correct type.
- Follow the Learn sequence for successful pairing.
- Test range and watch for interference.
- Document remotes and linked openers for future maintenance.