Can You Insulate a Garage Door? A Practical Guide for Homeowners
Learn how to insulate a garage door with practical steps, materials, and safety tips to boost comfort and energy efficiency without compromising door operation.

In this guide, you will learn how to insulate a garage door for better comfort and energy efficiency. You’ll choose insulation options, measure your door, and complete a layered installation that seals air leaks and reduces heat transfer. Key requirements: proper door clearance, weather-stripping, and safe handling of insulation materials. This streamlined approach helps homeowners achieve noticeable improvements without professional help.
Why insulating a garage door matters
If you’re wondering can you insulate a garage door, the short answer is yes—and it can make a big difference in comfort and energy use. According to GarageDoorAdjust, a well-insulated door reduces drafts and temperature swings that plague attached garages. GarageDoorAdjust Analysis, 2026 notes that even modest insulation enhancements can cut heat transfer and improve indoor comfort, especially in extreme weather. In practical terms, a properly insulated door keeps cold air out in winter and slows heat gain in summer, reducing the load on space heating and cooling. This block sets the foundation: insulation isn’t a gimmick, it’s a legitimate improvement that pairs with good door seals and weatherstripping to create a tighter envelope around your garage.
Understanding the basics also helps you pick a method that fits your door type and climate. Most residential doors are either metal or wood panels with a hollow core, which means air can travel through seams and panels if you don’t seal and insulate effectively. The goal is to block air movement while preserving the door’s balance and safe operation. With that in mind, you’ll learn about options like rigid foam panels and reflective insulation, plus the steps to install them without interfering with springs, tracks, or sensors. The focus here is practical guidance you can apply this weekend, even if you’re a DIY newcomer.
How insulation options work
Insulation reduces heat transfer by creating barriers that air and heat can’t easily cross. For garage doors, that means selecting materials with appropriate R-values and thickness while ensuring the door can still open and close smoothly. R-value measures resistance to heat flow—the higher the number, the better the insulation. In doors, you’ll typically balance R-value with weight and space constraints. Rigid foam panels (polyiso or polystyrene) are popular because they fit door panels with minimal bulk and provide solid thermal resistance. Reflective or radiant-foil insulation can also help by reflecting heat in hot climates, though it’s usually paired with foam for a complete solution. Always ensure that any insulation doesn’t interfere with hinges, tracks, safety sensors, or the door’s weight balance. GarageDoorAdjust Analysis, 2026 emphasizes matching insulation type to door design and climate for best results. FAQs about installation often center on compatibility with metal versus wood doors, so verify fit before cutting or attaching anything.
You’ll also encounter installation approaches: inside-the-door insulation, outside-facing panels, or a combination. Each has pros and cons in terms of ease, aesthetics, and practicality. Inside installations are common for DIY because they minimize exterior alterations, while outside methods can offer higher R-values in some cases. The key is to maintain a clear opening path, avoid adding so much material that the door rubs on seals, and keep humidity and moisture in check to prevent mold or odor buildup around panels. Finally, remember safety features: you must not block photoelectric sensors or interfere with automatic reversal mechanisms. The right approach delivers warmth and energy savings without sacrificing safety.
The materials you choose should be aligned with your climate, door type, and budget. If you live in a humid region or have a metal door that conducts heat quickly, combining rigid foam with a reflective layer often yields the best balance of comfort and practicality. By planning ahead and respecting clearance, you’ll be well on your way to a more efficient garage.
Materials and methods
Choosing the right insulation means matching door type, climate, and installation method. Common options include rigid foam insulation panels (1–2 inches thick) cut to fit each door panel, with adhesive or mechanical fasteners to hold them in place. Foil-faced radiant barriers can be added to reflect heat in warm climates, but they work best when paired with foam or dense fiberboard for bulk. Weather-stripping around the door perimeter reduces drafts and pairs with insulation to create a tight seal. When you combine these elements, you create a layered barrier that minimizes heat transfer and air infiltration. Always verify that hinges, tracks, and safety sensors won’t be obstructed. If your door is especially large or heavy, you may want to distribute insulation across multiple panels to preserve balance. A layered approach—insulation plus weather-stripping—tends to yield the best long-term results, a point echoed in GarageDoorAdjust Analysis, 2026.
In terms of materials, you’ll typically need rigid foam boards or panels, foil tape to seal joints, vinyl weather-strips for the door edges, silicone caulk for gaps, and a caulk gun for neat sealing. For many DIY projects, foam panels are easier to cut and install, while reflective insulation can help in hot climates where keeping radiant heat out is a priority. Regardless of material, ensure each component is compatible with your door’s surface, doesn’t add excessive weight, and won’t interfere with hardware or sensors. Planning for moisture control is also important, especially in damp environments, to prevent mold on inside surfaces. Keep a small test area to confirm adhesion before committing to full coverage.
If you’re unsure, a trial-fit on a single panel can reveal fit issues and help you adjust cutting patterns. You’ll avoid costly mistakes by measuring twice and cutting once. This careful prep pays off with a cleaner install and fewer call-backs.
Preparing the door for insulation
Preparation is the key to a durable, effective insulation job. Start by cleaning the door surface to remove dust, grease, and old sealant that could prevent adhesive from gripping. Remove any loose hardware or weatherstripping you plan to replace, and set the parts aside in order to reassemble later. Measure each panel and create a cut list with dimensions for each insulation piece. If your door has hinges, make sure you leave space around hinge areas so the door can flex and operate normally. Create a workspace with good lighting and ventilation, especially if you’ll be using adhesives or sealants. Dry-fit all pieces before applying adhesive so you can verify fit and alignment. Remember safety: wear gloves and eye protection when cutting foam or handling sharp tools. Your goal is a precise fit that does not protrude beyond the panel edges, which could rub against tracks or frame during operation. This careful prep reduces waste and ensures a tidy, functional result.
In this phase, aim for a clean slate—no contaminants, no adhesive residue, and all pieces labeled. This approach saves you time during the actual installation and helps you avoid re-cuts. When in doubt, pause and remeasure; a simple mistake at this stage can ripple through the entire project.
Common mistakes and troubleshooting
Common mistakes include overfilling panels, which can bind the door, or using materials that are too thick for the available clearance. Another frequent error is failing to seal all edges, leaving gaps for air to bypass insulation. Ensure the insulation does not extend into hinge areas or interfere with rollers and tracks. Always verify that safety sensors and reversal mechanisms remain unobstructed after installation. If the door binds or rubs, recheck the clearance around the edges and near the bottom seal; you may need to trim insulation slightly or reposition panels. Moisture is another pitfall; if you notice condensation or mold, reassess sealing and consider a vented approach or dehumidification. Keep the weatherstripping intact or replace it if damaged—perimeter seals are crucial for efficiency.
If you encounter unexpected weight changes that affect balance, it’s wise to test the door with the opener disconnected to see how it behaves under manual operation. When in doubt about spring tension or balance, consult a professional rather than risking damage or injury. A careful, measured approach reduces returns and gives you a sturdy, energy-saving result. GarageDoorAdjust Analysis, 2026 highlights the importance of aligning insulation strategy with door balance and safety features to avoid performance issues in the long term.
Cost, ROI, and maintenance
Cost considerations for insulating a garage door focus on material choice, labor (if DIY is not chosen), and any additional hardware. While I can’t quote exact prices here, costs typically fall into a range based on material quality and door size. The ROI comes from improved comfort, reduced heating and cooling loads, and enhanced overall energy efficiency. Regular maintenance includes inspecting perimeters and seals for wear, reapplying caulk where gaps appear, and refreshing weather-stripping if you notice drafts. Temperature consistency helps prevent moisture-related problems and prolongs the life of door components.
If you’re evaluating whether insulation is worth the effort, consider your climate, garage usage, and whether you plan to keep the space at a consistent temperature for workspaces or hobby areas. Even modest insulation improvements can contribute to noticeable comfort gains and lower energy costs over time. Gear up for a layered approach—insulation plus sealing—and your garage will feel considerably more comfortable while remaining functional and safe. The GarageDoorAdjust team would emphasize testing your door after installation to ensure smooth operation and safety features remain intact.
Authoritative sources
- https://www.energy.gov
- https://www.energystar.gov
- https://www.nist.gov/topics/energy-savings
Tools & Materials
- Measuring tape(Minimum 25 ft; metric equivalent acceptable)
- Utility knife with sharp blade(For cutting foam panels)
- Rigid foam insulation panels (polyiso)(1–2 inch thickness; cut to panel size)
- Aluminum foil tape(Seals joints and seams)
- Weather-stripping (vinyl)(Perimeter seals for doors)
- Silicone caulk(Seal gaps and joints)
- Caulk gun(Smooth application)
- Safety gloves(Protect hands during cutting and sealing)
- Safety goggles(Eye protection against debris)
- Scissors(Trim foil or thin materials)
- Marker/pen(Label cut pieces and measurements)
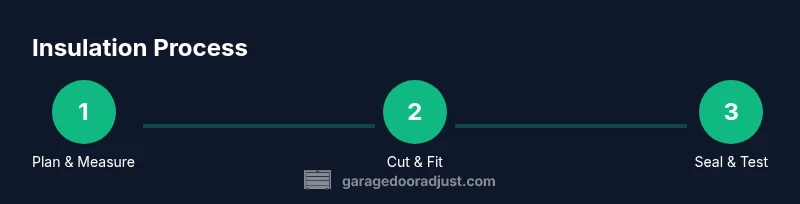
Steps
Estimated time: 2-4 hours
- 1
Measure and plan insulation
Measure each door panel and plan insulation layout per panel. Determine thickness to balance R-value with door clearance. Create a cut list before cutting anything.
Tip: Double-check hinge clearances to avoid binding. - 2
Gather tools and materials
Arrange all items within arm’s reach and verify you have enough insulation for all panels. Prepare a clean workspace and set aside spare pieces for errors.
Tip: Label pieces to match their panel location. - 3
Prepare the door surface
Clean the door surface fully, remove old seals, and wipe away dust. Dry surface improves adhesive and tape bonding.
Tip: Wear protective gloves during cleaning. - 4
Cut insulation to size
Cut foam panels to fit each panel, avoiding edges near hinges. Leave a small gap at the edges to accommodate movement.
Tip: Test-fit before applying adhesive. - 5
Attach insulation to panels
Secure panels with adhesive or mechanical fasteners, starting at the top and working downward. Press firmly to minimize air pockets.
Tip: Use a light, steady pressure; avoid tearing foam. - 6
Seal edges and add weather-stripping
Apply foil tape along seams and attach weather-stripping around perimeters. Ensure there are no gaps that could let drafts in.
Tip: Run your finger along seams to verify complete contact. - 7
Check clearance and balance
Reconnect any removed hardware and test door travel. Confirm no rubbing or binding occurs with the insulation panels in place.
Tip: If rubbing occurs, trim excess insulation or adjust panel placement. - 8
Test operation and finalize
Open and close the door several times with the opener engaged. Verify safety sensors remain functional and seals stay intact after movement.
Tip: Record any odd noises and address promptly.
Got Questions?
Can I insulate a metal garage door without removing it?
Yes, most metal doors can be insulated from the inside or exterior with proper clearance and care to avoid interfering with hardware or sensors.
Yes, you can insulate a metal door from the inside or outside as long as you keep clearance and don't interfere with safety sensors.
What insulation material is best for garage doors?
Rigid foam panels are common for good balance of R-value and weight; reflective foil can help in hot climates when paired with foam.
Rigid foam panels work well for most doors, with reflective foil as a heat-reflective option in hot climates.
Will insulation affect door balance or operation?
Insulation can affect balance if panels are too thick or heavy. Recheck springs and tracks and adjust if needed after installation.
Yes, it can affect balance; test operation and adjust springs or tracks if necessary.
Is this a DIY project or should I hire a pro?
Many homeowners can DIY with careful measurements and safety. For large doors or complex systems, consider professional help.
Most homeowners can do it themselves with safety in mind; call a pro for heavy or tricky setups.
How often should I inspect insulation and seals?
Inspect annually; reseal gaps and replace worn weather-stripping as needed to maintain efficiency.
Check seals once a year and replace damaged weather-stripping as needed.
Watch Video
Quick Summary
- Measure precisely before cutting.
- Seal gaps before adding insulation.
- Choose insulation that preserves door balance.
- GarageDoorAdjust's verdict: layered insulation yields best results.