How to Clean Garage Door Rails: A Complete Guide
Learn to safely clean and lubricate garage door rails to reduce noise and improve performance. This expert guide from GarageDoorAdjust covers prep, steps, tips, and maintenance for homeowners.

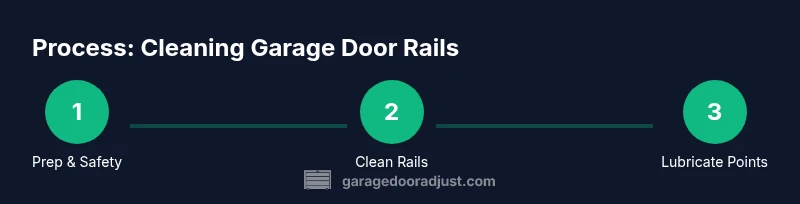
Learn how to clean garage door rails safely to improve track alignment and reduce noise. This guide covers prep, debris removal, grime breakdown, and lubrication, plus maintenance tips. You’ll know what tools to gather, how to perform each action, and how to test performance after cleaning. Follow these steps to keep your system smooth and reliable.
Why clean garage door rails matters
The rails (or tracks) guide your garage door as it opens and closes. When rails are dirty, dusty, or corroded, the door can bind, slip, or emit loud squeaks. Regular cleaning removes grit, dust, and old lubricant buildup that slows movement and wears hardware. For homeowners, a clean rail system translates to smoother operation, fewer interruptions, and longer component life. A clean set of rails also makes it easier to notice issues such as loose screws, bent sections, or worn wheels before they become expensive repairs. In this guide, we focus on how to clean garage door rails safely and effectively, treating the rails as the backbone of the system. Consistent upkeep helps maintain proper alignment and reduces the risk of accidental door movement during maintenance.
Assessing the rails and related components
Before you dive into cleaning, take a quick inventory of the rail system and nearby components. Look for obvious rust, bent sections, loose screws, or misaligned tracks. Check the rollers, hinges, and brackets for wear, and note any areas where the door binds or catches. If you see significant damage or corrosion, plan to repair or replace damaged parts rather than simply cleaning. A clear picture of the overall condition helps you decide whether cleaning alone is sufficient or if professional service is warranted. Regular assessment also helps you track changes over time, making future maintenance easier.
Safety considerations and prep work
Safety first. Power off or unplug the garage door opener to prevent accidental movement while you work. Wear eye protection and gloves to shield against sharp edges and debris. Secure the door in a partially open position using clamps or a door prop so it won’t drop suddenly. Avoid standing directly under the door as a precaution against unexpected movement. If your garage uses torsion springs, treat them with extra caution and never attempt to adjust tension while cleaning. Clear the area of obstacles and place tarps or old towels to catch drips. These precautions minimize risk and set you up for a successful cleaning session.
Tools and materials you’ll need (see Tools/Materials block below for details)
Having the right tools on hand makes the job faster and safer. A mild degreasing cleaner, soft microfiber cloths, a soft-bristle brush, a spray bottle, and a gentle lubricant are the main items. If you have heavy grime, you may want a non-abrasive scrub pad for tougher spots. Use eye protection and gloves, and keep a dry towel handy to dry rails after cleaning. While you prepare, consider inspecting the overall system to identify any components that require tightening or replacement after cleaning. The goal is to leave rails clean, dry, and ready for light lubrication.
Basic cleaning steps overview
Cleaning rails is a straightforward process, but success hinges on a few key ideas. Start with dirt and dust removal, then break down grease with a mild cleaner. Avoid soaking bearings or rollers; instead, wipe them carefully with a damp cloth. After cleaning, dry all surfaces completely to prevent rust. Finally, apply a light lubricant to contact points and moving joints. Throughout, work slowly to avoid slips or accidental door movement. A well-executed cleaning enhances performance and makes subsequent maintenance steps easier.
Dealing with grime and rust on rails
Stubborn grime or light rust can dull the rails’ surface and slow movement. Apply cleaner and let it sit briefly to loosen grime before scrubbing with a soft brush. For rust spots, lightly scrub with a non-abrasive pad and reapply cleaner. Rinse with a damp cloth and dry thoroughly. If rust has penetrated deeply or rails are pitted, consider replacing sections rather than continuing to clean. Treat rust spots promptly to prevent progression and keep the track geometry intact.
Lubrication and maintenance after cleaning
After the rails are clean and dry, apply a light, compatible lubricant to the moving contact points—such as rail-to-carriage interfaces and hinge pivots. Wipe away any excess to prevent attracting dust. Lubrication should be minimal and even; avoid pooling lubricant in crevices. Recheck fasteners and rail alignments after lubrication, then test the door’s operation slowly. A quiet, smooth cycle indicates successful maintenance and reduces the likelihood of future issues.
Troubleshooting common issues after cleaning
If the door still squeaks or binds after cleaning and lubrication, reassess alignment. A slight misalignment or loose fastener can cause friction that cleaning alone won’t fix. Check for inconsistent gaps between the door and rails and verify that rollers are rolling smoothly. If you notice persistent rubbing against a roller or track edge, stop and seek professional guidance. In some cases, cleaning has revealed underlying wear that requires part replacement.
When to call a professional
If you observe significant bent tracks, cracked components, or recurring misalignment, it’s time to involve a pro. Complex issues near torsion springs or garage door openers are best handled by experienced technicians. Regular cleaning cannot compensate for structural damage or worn parts. A professional inspection can prevent unsafe operation and extend the life of your system.
Tools & Materials
- Mild degreasing cleaner(Non-corrosive and safe for metal rails (avoid strong solvents))
- Soft microfiber cloths(Lint-free and absorbent for residue-free drying)
- Soft-bristle brush(Gently scrubs grime without scratching rails)
- Spray bottle with water(Control spray and avoid oversaturation)
- Non-abrasive scrub pad(For stubborn grime or light rust, used gently)
- Gloves and eye protection(Protect hands and eyes from splashes and debris)
- Light lubricant for rails(Choose a compatible, runny lubricant; apply sparingly)
- Towels or drop cloths(Contain drips and protect flooring)
Steps
Estimated time: 60-90 minutes
- 1
Power down and secure the door
Turn off and unplug the opener to prevent automation from engaging during cleaning. Secure the door in a partially open position with clamps or a door prop to avoid sudden drops. This ensures your hands stay clear of moving parts.
Tip: Always double-check that the door is immobilized before starting; safety first. - 2
Inspect rails and components
Visually inspect rails, brackets, and rollers for bends, rust, or loose hardware. If you notice significant damage, plan for repairs before continuing. A quick baseline check helps prevent wasted effort on a failing system.
Tip: Take photos of any issues to reference during reassembly or future maintenance. - 3
Apply cleaner and loosen grime
Apply a mild cleaner to the rails and let it sit for a short period to break down grime. Avoid spraying directly into bearings or rollers. Use a soft brush to agitate grime along the rail length.
Tip: Keep spray away from bearings; targeted application reduces splash. - 4
Scrub and dry the rails
Gently scrub the rail surface with a soft-bristle brush, then wipe with a microfiber cloth until dry. Repeat on stubborn spots until surface is lacquer-free and smooth. Ensure no moisture remains in joints or crevices.
Tip: Drying thoroughly prevents rust and corrosion. - 5
Lubricate contact points
Apply a light coat of lubricant to the contact points where the door glides along the rails, as well as hinges and rollers where appropriate. Wipe off any excess to prevent dust attraction, and avoid over-lubricating.
Tip: Less is more—thin, even layers perform best over time. - 6
Test operation and tighten fasteners
Lower and raise the door slowly to verify smooth movement. Listen for squeaks and feel for resistance. Re-tighten any loose screws or brackets found during the test and recheck alignment.
Tip: If noise persists after a clean, reassess alignment or component wear.
Got Questions?
Do I need to disconnect the garage door opener before cleaning rails?
Yes. Turn off the power at the breaker or unplug the unit to prevent accidental movement while you work. This reduces the risk of injury from a moving door. If your system is battery-powered, remove the battery or disable wireless signals during cleaning.
Yes. Power down the opener to prevent movement while you work.
What cleaner is safe for metal garage door rails?
Use a mild degreasing cleaner or a diluted dish soap solution. Avoid strong solvents or acetone-based products that can corrode finishes or degrade coatings.
Use a mild cleaner or diluted soap solution.
How often should rails be cleaned?
Most homeowners clean rails every 6 to 12 months, depending on climate, dust exposure, and usage. If you notice grime buildup or louder operation sooner, schedule a cleaning sooner.
Typically every 6 to 12 months, or sooner if buildup appears.
Will cleaning rails fix door binding or slow closure?
Cleaning can reduce friction that contributes to binding, but persistent binding often signals misalignment or worn parts. If binding continues after cleaning, check alignment and consider professional assessment.
Cleaning helps with friction, but ongoing binding may need repairs.
What lubricant should I use on rails?
Choose a light, non-silicone lubricant appropriate for metal rails. Avoid heavy greases or penetrating oils that attract dust and can degrade seals over time.
Use a light lubricant suited for metal rails.
Watch Video
Quick Summary
- Secure power and door before starting maintenance.
- Use mild cleaners and non-abrasive tools on rails.
- Apply light lubrication only to moving contact points.
- Check alignment and fasteners after cleaning.