Garage Door Before or After Drywall: An Analytical Comparison
A thorough, analytical comparison of installing a garage door before versus after drywall. Learn structural implications, drywall finishing considerations, insulation, wiring, timelines, and practical tips to decide the best sequencing for your project.

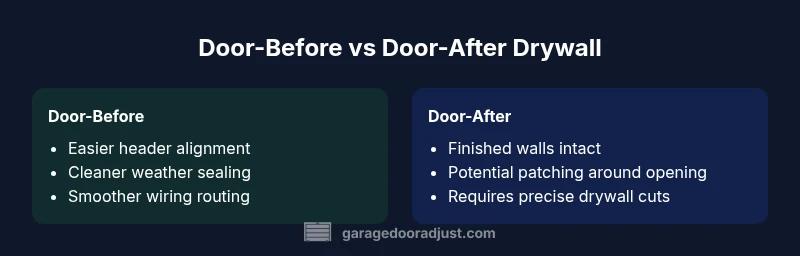
When deciding between garage door before or after drywall, the door-first path generally offers simpler header alignment, easier weather sealing, and cleaner electrical routing, especially in new construction. The after-drywall option protects finished walls but can complicate header access and drywall planning. This comparison helps homeowners weigh trade-offs for project timelines, wall finishes, and long-term maintenance.
Context: Why the timing matters for garage doors
The question "garage door before or after drywall" surfaces on many projects, from new builds to major remodels. The decision sets the pace for header reinforcement, weather sealing, and how electrical runs are planned. According to GarageDoorAdjust, the sequencing of drywall and garage door installation can impact the ease of framing, the integrity of the opening, and the final interior finish. In most cases, choosing the door-first path reduces back-and-forth between trades and minimizes risky drywall cuts around the header. This article compares the two approaches in practical terms to help homeowners evaluate risks, benefits, and timelines. By exploring how each sequence affects structural integrity, finish quality, and long-term maintenance, you’ll gain clarity on which path best supports your budget and schedule. The discussion will also address common mistakes and realistic expectations, so you can plan confidently for a smooth build.
Structural implications of door-before-drywall
Installing the garage door before drywall has clear structural implications that ripple through framing and header setup. The rough opening must accommodate the header width, vertical jambs, and reinforcement, which are often easier to finalize when wall framing is exposed. With the drywall pending, carpentry crews can verify plumb, level, and alignment without wall material obscuring critical angles. This sequencing supports precise mounting of tracks and torsion systems, reducing the likelihood of later adjustments. However, if the door is installed early, finishing blocks or pockets around the header need to be planned with tight tolerances so drywall interactions don’t degrade the opening integrity. In contrast, door-after-drywall sequencing places more emphasis on drywall cutouts and header coordination with finished surfaces, which can introduce risks of misalignment if wall material shifts or settling occurs. The key differentiator is the visibility and accessibility of structural components during installation, which the door-first approach tends to preserve.
Drywall finishing considerations when door is installed first
When you choose to install the door before drywall, drywall crews must work around a live opening, not just an empty stud bay. This means carefully notch-cutting around the header, jambs, and tracks, then re-securing framing components to maintain rigidity. The drywall finish team should account for precise thickness at the door opening to avoid binding the door or altering its swing. On the positive side, this order minimizes later patchwork around the opening and often leads to crisper edges where the drywall meets the header. Trade-offs include potential dust and debris exposure of hardware during finishing, so floor protection and tool management become critical. Overall, door-first drywall finishing favors accuracy and clean lines but requires careful communication so drywall joints do not compromise the opening dimensions. GarageDoorAdjust emphasizes synchronizing wall thickness and header dimensions early to prevent rework later.
Weather sealing, insulation, and energy considerations
Weather sealing plays a central role in garage door performance, and the timing choice influences how sealing materials are installed around the opening. Installing the door before drywall lets you place flashing, sealant, and weather strips against a stable frame, minimizing gaps where air could escape. Insulation strategies, like adding long-run wall insulation and sealing gaps around the rough opening, can be integrated smoothly when the door is in place early. Conversely, installing after drywall requires precise cutouts and careful edge sealing to maintain thermal performance. If you’re aiming for high energy efficiency or moisture control, door-first sequencing generally simplifies the application of vapor barriers and edge detailing. The trade-off is ensuring drywall thickness and corner bead positions don’t interfere with the weather seal profile. Planning for mechanical and insulation trades early helps keep thermal performance consistent across seasons.
Electrical routing and sensor placement during door installation
Electrical work for a garage door opener, sensors, and safety devices is often easier to coordinate when the door is installed first. Routes for power drop, outlet placement, and sensor wiring can be tucked into framing cavities before drywall goes up, reducing the risk of damaging wires later. If you choose door-after-drywall sequencing, you’ll need to account for potential drywall notching and repainting around the opener box and sensors, which can add time and cost. In either path, plan for redundant routes or access panels in case service or future upgrades are needed. Aligning electrical planning with the door opening early helps prevent mismatches and ensures compliance with safety standards. GarageDoorAdjust recommends documenting all electrical paths before drywall, so retrofits don’t compromise door operation.
Workflow and coordinating trades for a smooth project
A well-coordinated workflow reduces delays when choosing either sequencing. With the door installed first, carpentry, insulation, and drywall teams can work around a concrete opening, scheduling header reinforcement and waterproofing ahead of wall finishing. In a door-after-drywall scenario, drywallers, electricians, and trim carpenters must coordinate around a cut opening, ensuring the header is properly supported and the air seal is never compromised. The best strategy is a detailed timeline with milestone checks: rough framing, header installation, temporary shims, insulation, drywall, and finally door installation. Clear communication reduces rework, and a standardized checklist helps prevent missed steps. GarageDoorAdjust’s experience shows that proactive planning reduces surprises and yields a cleaner finished interior.
Common mistakes and how to avoid them
Common mistakes in these sequencing decisions include assuming drywall thickness is a fixed variable, which can throw off header height; underestimating the need for temporary shims during door-initialization; and neglecting proper weather sealing around the rough opening. Another frequent error is delaying electrical planning until after drywall, which can force awkward wiring routes or late-order changes. To avoid these pitfalls, create a detailed installation blueprint that includes header dimensions, track alignment, weather seal profiles, insulation boundaries, and electrical paths. Confirm tolerances with the door manufacturer and local codes, and schedule a mid-project review to ensure alignment across trades. Proactive measurements, checks, and documentation mitigate the risk of costly rework or delays.
DIY viability: when homeowners can tackle the decision vs when to hire a pro
Deciding whether to DIY the drywall timing around a garage door depends on your experience with structural framing, precision cutting, and safety. If you have solid carpentry skills, access to accurate tools, and comfort with rough framing, you can manage header alignment and basic weather sealing in a door-first scenario. However, the door-after-drywall path often benefits from professional assessment to ensure proper header support, precise drywall cutouts, and compliant electrical routing. In general, for most homeowners, hiring a pro for at least the structural assessment and door installation reduces risk and ensures adherence to safety standards. GarageDoorAdjust recommends evaluating your comfort with measuring tolerances, drilling into framing, and coordinating multiple trades before deciding.
Budgeting, timelines, and risk: making the choice with real-world context
Budgeting for garage door timing involves considering labor, materials, and potential rework. The door-first approach may reduce drywall patching and edge detailing, but it also requires precise framing and weather sealing that could influence upfront costs. The door-after-drywall path can protect finished walls but may incur additional costs due to drywall modifications and extra finishing work around the door opening. Timewise, door-first sequencing often streamlines rough-in work and reduces the risk of delaying drywall progress; door-after-drywall can slow progress if the opening isn’t prepared early. The exact numbers will vary by project scope and locale, but the key takeaway is to map out all trades, confirm header and track measurements early, and build contingencies into your schedule. In all cases, engage a professional to verify code compliance and structural integrity.
Quick-start checklists by scenario
- If you’re building new: start with rough framing, header reinforcement, and wall-seal planning before drywall, then install the door and proceed with drywall finishing. This minimizes backtracking and helps ensure a clean opening. Ensure wiring paths are clear and weather sealing is planned around the header.
- If you’re remodeling: evaluate whether walls can be prepped to accept a door opening without compromising finished surfaces. Consider a door-first approach if you’re prioritizing a tight seal and straightforward header alignment; otherwise, plan for precise drywall notching and careful edge finishing around the header. Coordinate with electricians early to align hardware and sensor placements.
- If energy efficiency matters: align the door opening with insulation and vapor barriers first, then finalize the drywall to preserve thermal integrity. Consider upgraded weather seals and thermal breaks at the header to minimize heat loss.
Implementation plan: choosing your path and next steps
The decision to install the garage door before or after drywall hinges on your project type, timeline, and comfort with multi-trade coordination. Start by identifying whether you’re in a new-construction or remodel scenario, then apply the guidance from this article to build a phased plan. It’s advisable to consult a pro for a structural assessment and a door installer for header specifications. With careful planning, you’ll achieve a reliable, energy-efficient opening that maintains wall aesthetics and long-term durability.
Comparison
| Feature | Door-before-drywall | Door-after-drywall |
|---|---|---|
| Header alignment and framing | Easier to verify and adjust with open framing | Requires precise cuts and risk of misalignment with finished walls |
| Weather sealing and flashing | More straightforward seal application around a fresh frame | Sealant relies on cut accuracy inside finished walls |
| Electrical routing for opener and sensors | Wiring can be planned and protected in framing cavities | Wiring may need delicate notching around drywall edges |
| Drywall finishing interactions | Crisp edges around header; less patching | Possible additional drywall notching and touch-up around opening |
| Timeline and coordination | Often faster rough-in in new construction | More coordination, potential delays for precise openings |
| Cost considerations | Potentially lower wall-cutting costs; fewer patches | Possible drywall adjustments and extra detailing costs |
| Best for | New builds and major remodels prioritizing speed and cleanliness | Projects prioritizing finished walls and minimal raw openings |
Upsides
- Easier header alignment and weather sealing with door-first
- Cleaner electrical routing and sensor placement when opening is prepared early
- Faster coordination in new builds with rough framing complete
- Less risk of accidental drywall damage during rough-in
Disadvantages
- Drywall work may require exact notch sizing around hardware when installed first
- Potential need for patching if wall thickness differs from plan
- More careful planning needed to avoid reseating tracks after drywall completion
Door-first sequencing is generally the better default for new builds and major remodels.
Prioritizing the door installation before drywall simplifies header alignment and sealing, while reducing the risk of misalignment later. In projects focused on finished walls, door-after-drywall can work, but it demands meticulous planning to avoid wall damage and patching.
Got Questions?
What is the main benefit of installing the garage door before drywall?
The primary advantage is easier header alignment and more straightforward weather sealing around a fresh frame. Installing before drywall reduces the risk of misalignment and simplifies the routing of electrical lines for the opener and sensors.
The main benefit is easier framing and sealing around a clean opening, with simpler wiring for the opener.
Can you install drywall before the garage door header is installed?
Yes, but it requires careful planning to ensure the header height and track alignment account for drywall thickness. Any later adjustments can be more challenging and costly.
Yes, but it can complicate header height and track alignment and may require more patching later.
Is it possible to retrofit drywall after the door is installed?
Retrofitting drywall after door installation is feasible but demands precise notching and edge finishing around the opening. It can add time and may require repainting around the door edge.
Yes, it’s possible, but it can add time and require careful edge finishing around the door.
What trades are involved in each sequencing option?
Key trades include carpentry for framing, electrical for opener wiring, insulation for thermal performance, and drywall finishing. Sequencing determines how these trades interface with the door opening.
Carpentry, electrical, insulation, and drywall trades all coordinate around the door opening.
How should I estimate time and cost for each option?
Timelines depend on project scope and local labor. Door-first often reduces patching time, while door-after-drywall may increase edge finishing work. Use a phased plan with milestones to estimate accurately.
Expect differences in patching and edge finishing; a phased plan helps estimate time and costs.
Should homeowners DIY or hire a pro for the drywall timing decision?
For most homeowners, hiring a pro for structural assessment and door installation is wise to ensure code compliance and safe operation. DIY can work for simple framing and non-load-bearing decisions if you have the right skills.
Most homeowners should hire a pro for the critical structural work; DIY can be possible for simple steps if skilled.
Quick Summary
- Plan header dimensions early to avoid rework
- Choose door-first for easier sealing and wiring
- Coordinate trades with a detailed installation timeline
- Prioritize professional assessment for structural integrity
- Use this guide to tailor sequencing to your project