How to Black Out Garage Door Windows: A Complete DIY Guide
Learn how to safely and effectively black out garage door windows using privacy film, exterior shutters, or blackout blinds. This step-by-step guide covers methods, tools, safety tips, and maintenance to boost privacy, light control, and curb appeal for a DIY-friendly project.

In this guide you'll learn how to safely and effectively black out your garage door windows using privacy film, blackout adhesive, or exterior shutters. You'll decide between temporary and permanent options, assess window materials, and follow a step-by-step process to maintain exterior curb appeal while improving privacy. No professional permit required for most DIY methods.
Safety and Legal Considerations
If you’re researching how to black out garage door windows, begin with safety and compliance. Privacy improvements are great, but you must respect window visibility requirements in your area. Some municipalities require visibility through glass for safety; check local zoning, HOA rules, or building codes before choosing a method. According to GarageDoorAdjust, the most reliable results come from choosing a method compatible with your window type and climate. Start with a quick survey: note window size, frame material, and whether the glass is tempered or insulated. If your neighborhood has covenants on exterior appearances, confirm acceptable treatments. For vehicle safety, ensure that any approach keeps a clear line of sight in the door opening when the door is raised. If in doubt, start with a temporary option (like removable privacy film) so you can test appearance and performance without committing to a permanent modification. This approach reduces risk and protects your home value while you evaluate your privacy goals.
Understanding Your Garage Door Windows
Garage door windows come in several glass configurations, including tempered glass, laminated glass, and insulated glass units (IGUs). Tempered glass is strong but can crack if bent or impacted, while IGUs add insulation but complicate film application. Privacy needs vary by climate and orientation; southern exposures may require thicker or UV-filtering films to prevent heat buildup. Before choosing a blackout method, identify whether you have exterior frame access, the window size, and whether the glass is clear or already tinted. GarageDoorAdjust’s guidance emphasizes starting with compatibility checks—some films and coverings can affect warranty or door balance if misapplied. If you live in a windy or coastal area, select products rated for exterior use and corrosion resistance. Finally, consider how the blackout choice impacts light levels, ventilation, and your ability to see outside when needed for safety.
Methods to Black Out: Pros and Cons
There are several ways to achieve blackout for garage door windows, each with trade-offs:
- Privacy window film (temporary or permanent): Simple to install, affordable, and reversible. Static-cling varieties are ideal for renters or testing phases, while adhesive films offer stronger adhesion for permanent setups.
- Exterior shutters or blinds: Durable and seasonally adjustable, these provide shade and security but require more upfront investment and professional installation if not a DIY-friendly model.
- Interior blackout blinds or curtains: Quick to install and reversible, but may affect the door’s internal mechanism if they obstruct the glass when the door moves.
- Vinyl decals or decorative panels: Aesthetically flexible but may reduce exterior visibility and require careful measuring to avoid interference with door tracks. Choosing the right method depends on window type, climate, required duration, and your tolerance for maintenance. GarageDoorAdjust researchers note that many homeowners prefer film for its balance of ease, reversibility, and cost, especially for garage door windows that face street view.
Preparation and Safety Checklist
Before you start, gather your tools and verify window sizes. Clean the glass thoroughly to ensure the film or panel adheres properly. If you’re opting for exterior shutters or blinds, confirm mounting points and clearance when the door opens. For safety, unplug or disable the garage door opener during installation to prevent accidental movement. Always wear protective gloves and eye protection when cutting or handling sharp edges. Mark the window edges with painter’s tape to protect frames and help align materials. Finally, test a small area first if you’re using tint film to ensure there’s no residue or damage. Following these steps reduces stubborn air pockets, misalignment, and potential warranty concerns.
Maintenance, Reversibility, and Longevity
Most blackout window solutions are reversible if installed properly and chosen for exterior use. Window film, especially static-cling types, can be removed with minimal residue; adhesive films may leave a trace but are generally peel-off friendly with the right solvent. Exterior shutters and blinds require occasional cleaning and weatherproofing, but they typically last longer in harsher climates. Regular checks should include inspecting edges for lifting, ensuring seals remain intact, and cleaning any collected dust or debris that could cause micro-scratches. If you notice bubbling under film, lifting edges, or reduced visibility when needed, reassess the installation and choose a more suitable option. GarageDoorAdjust’s approach emphasizes planning for both privacy goals and practical maintenance to keep your garage door looking great over time.
Aesthetic Impact and Home Value
Blackout options influence curb appeal and home value by changing exterior appearance and light dynamics. A clean, well-maintained blackout treatment looks intentional and modern, while poorly applied film or mismatched shutters can suggest neglect. When selecting a method, consider color coordination with your garage door, trim, and adjacent siding. Light-blocking solutions should also preserve some exterior visibility for safety during entry or exit. If you plan to sell your home, choose a reversible solution that won’t permanently alter the glass or frame unless you’re confident the upgrade aligns with buyer expectations. GarageDoorAdjust encourages homeowners to balance privacy with aesthetics, ensuring the treatment enhances rather than detracts from your home’s overall character.
Tools & Materials
- Privacy window film (static cling or adhesive)(Choose 3-6 mil thickness for durability; ensure exterior-grade if used outside)
- Razor blade or utility knife(For trimming edges precisely without scratching frames)
- Squeegee or straight-edge card(To smooth out air pockets during application)
- Spray bottle filled with water and a drop of dish soap(Helps with positioning and bubble-free application)
- Lint-free microfiber cloth(For cleaning and final wipe-down)
- Measuring tape(Accurate cuts to avoid overhanging film)
- Masking tape/painter’s tape(Mask edges and secure film as you work)
- Ladder or stable stool(Only if windows are high or hard to reach)
- Exterior window shading (blinds/shades)(Optional for a durable blackout solution)
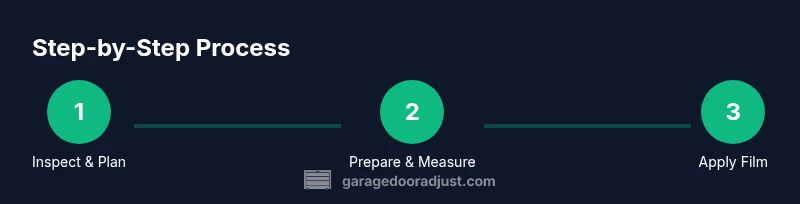
Steps
Estimated time: 60-180 minutes
- 1
Inspect window type and choose a blackout method
Examine whether the glass is tempered, laminated, or IGU. Decide between window film, exterior shutters, or interior blinds based on durability, climate, and whether you want a reversible option.
Tip: Start with a test area using a small piece of film to confirm adhesion and visibility from inside. - 2
Prepare the work area and gather materials
Clear the garage area, lay down a drop cloth, and ensure you have all tools within arm’s reach. Protect surrounding surfaces, especially metal trim, to prevent scratches or residue.
Tip: Mask edges with painter’s tape to improve film alignment and prevent edge lifting. - 3
Clean window surfaces thoroughly
Wipe the glass with a damp microfiber cloth, then dry completely. Any dust or oils will cause air pockets and poor adhesion.
Tip: Avoid using abrasive cleaners that could leave scratches on the glass. - 4
Measure and cut the blackout material
Accurately measure each pane, then cut film with a small margin (about 1/4 inch) to allow for trimming after application.
Tip: Double-check measurements before cutting; errors are harder to correct after application. - 5
Apply the film or install the shading
For film: mist the glass, peel backing if adhesive, align, and smooth from center outward using a squeegee. For exterior shading: mount per manufacturer instructions, ensuring no interference with the door track.
Tip: Work slowly to avoid air bubbles and misalignment. - 6
Trim excess material and seal edges
Trim with a sharp blade, then re-squeegee or press firmly to ensure complete contact with the glass.
Tip: Take small passes with the blade to prevent damaging the film or frame. - 7
Cure, test, and clean up
Allow adhesive to set per product instructions (often 24–48 hours). Check visibility from inside and adjust if needed. Clean tools and dispose of waste responsibly.
Tip: Keep things dry during curing to prevent air pockets.
Got Questions?
Is window film safe for all garage door glass types?
Most window films work on tempered and laminated glass, but some coatings may not adhere well to specialized IGUs. Always check manufacturer compatibility before buying.
Most films work on tempered or laminated glass, but check compatibility for your specific glass type.
Can I remove blackout film later without damage?
Many films are designed to be removable, especially static-cling types. Adhesive films can be peeled off but may leave residue that requires cleaning solvent or a gentle scrape.
You can usually remove it, but you might need a cleaner to remove any residue.
Will blackout windows affect the garage door warranty?
Some door manufacturers restrict permanent modifications to glass or coatings. Check your door’s warranty terms before applying permanent films or hardware.
Check your warranty terms to avoid voiding coverage.
How long does it take to install blackout film on multiple panels?
A typical install for a standard two-door panel setup takes 60-120 minutes, depending on pane size and whether you’re using adhesive or static film.
Expect about one to two hours for standard panels.
Can I install blackout blinds instead of film?
Yes. Exterior or interior blinds can provide blackout without adhesive film, but installation may be more involved and costlier.
Blinds are a solid alternative if you want a durable, adjustable solution.
Do I need professional help for high garage doors?
If windows are high or near electrical components, consider professional installation for safety and proper mounting.
For high or hard-to-reach windows, a pro can help ensure safety.
Watch Video
Quick Summary
- Choose a reversible blackout method for flexibility
- Measure precisely to prevent trim waste
- Clean surfaces thoroughly for best adhesion
- Test a small area before full installation
- Follow curing times to ensure durability