Garage Door Christmas Decorations: A Step-by-Step Guide
Learn safe, weatherproof ways to decorate your garage door for Christmas with step-by-step instructions, materials lists, and safety tips from GarageDoorAdjust.

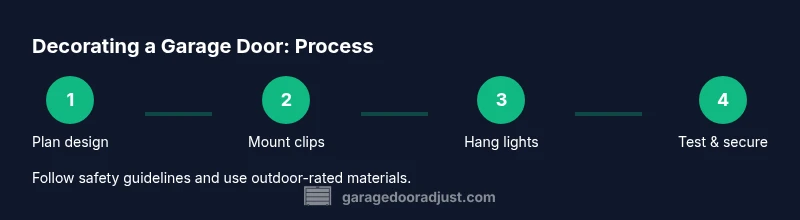
Decorate your garage door safely with weatherproof lights and exterior-safe decor, using outdoor hooks and a sturdy plan. This guide provides a clear, step-by-step approach to mounting, testing, and final adjustments that preserve door function while adding festive curb appeal.
Planning your garage door Christmas decorations
When you plan garage door xmas decorations, you set up for a festive display that stays safe and functional. Start by defining three elements: the mood (classic, whimsy, or modern), the lighting approach (static lights vs. animated), and how the door will operate with the decor installed. According to GarageDoorAdjust, a clear plan reduces risk of damage to the door or wiring and helps you budget correctly. Measure the garage door width and height, note any obstructions such as weather seals, handles, or windows, and decide where to place your focal accents. Sketch a rough layout on paper or a quick digital mock-up to visualize spacing, color temperature, and timing. This upfront planning also makes it easier to store and reuse decor in future seasons, ensuring a quicker routine each year. Keep in mind that the plan should accommodate seasonal changes—from heavy snow to rain—without compromising access or safety.
Safety first: electrical, weatherproofing, and access
Festive lighting on a garage door requires attention to electrical safety and weatherproofing. Use outdoor-rated, 120V or 12V DC LED lights with approved connectors and IP65 or higher ratings. Ensure that any extension cords run along the ground away from vehicle paths, or use overhead routing with grommets and clips. Never attach lights to moving parts, and avoid door sensors or springs contact. The GarageDoorAdjust team emphasizes testing connections before cold weather sets in. Weatherproof power strips and GFCI outlets reduce shock risk, and insulated, temperature-rated tape protects wire splices from moisture. Finally, keep a clear zigzag or linear path to avoid tripping hazards and check that the door can open and close freely with decorations in place. If you’re unsure about wire routing, consult a licensed electrician.
Design ideas that work with a garage door
A garage door is a large, flat surface that can serve as a canvas for bold or delicate seasonal motifs. Consider a central focal feature such as a large wreath or a stylized snowflake cutout, complemented by smaller accents along the door panels. Use LEDs in cool white for a modern look or warm white for traditional charm. For color, limit to 2–3 hues to avoid visual clutter, and balance lights with non-electrical decor like fabric ribbons or weatherproof decals. Pro tip: create a repeatable pattern that aligns with the door’s vertical lines to accentuate symmetry. Remember to keep your design scalable—start with a few statement pieces and add bursts of sparkle around peak hours using timers. The goal is to catch the eye without overpowering curb appeal or hindering function.
Lighting options: LEDs, bulbs, and timers
LED strips, net lights, and icicle lights each offer distinct aesthetics. For a garage door, aim for a layered approach: a base layer of warm or cool LEDs along the frame, a secondary accent of net lights in the windows if present, and selective use of decorative bulbs for focal points. Timers or smart plugs help manage energy use and ensure the display shines at dusk and fades by late night. Choose weatherproof connectors and avoid overloading circuits. A well-planned lighting scheme reduces glare on the door’s surface and minimizes heat buildup near plastic decorations. Keep cords away from the door’s travel path and never tuck lights under the door crest where movement could cause wear.
Mounting strategies: hooks, clips, and weatherproof tape
Garage door surfaces vary—metal, painted steel, or insulated panels—so choose mounting methods that won’t scratch or peel finishes. Favor exterior-rated clips, removable adhesive hooks rated for outdoor use, and lightweight zip ties to secure strings without tension on the door’s mechanism. Avoid mounting directly over hinges or sensors, which can interfere with operation. If you must place decorations near locking points, use low-profile clips that distribute weight evenly. Regularly inspect mounts for wind stress after storms and replace any worn components promptly. By using proper mounting techniques, you reduce the risk of a decoration becoming a projectile in high winds.
Materials and prep: checklist
Before you hang a single bulb, assemble a complete materials kit. Essential items include outdoor-rated LED lights, outdoor extension cords, weatherproof hooks or clips, zip ties, weatherproof tape for splices, a sturdy ladder, safety gloves, measuring tape, cleaning supplies, and a utility knife. Have a timer or smart plug on hand to automate the display. Create a workspace that stays dry, organized, and away from the door’s moving parts. If you plan a multi-color design, group lights by color on separate runs to simplify adjustments. A thorough prep reduces last-minute trips to the hardware store and minimizes the chance of moisture seeping into electrical connections.
Weather considerations: snow, rain, wind
Outdoor holiday décor should tolerate seasonal weather. Always test decorations after a snowstorm or heavy rain and remove any moisture before powering them. In windy conditions, use heavier fasteners or anchor points and avoid loose strands that can flap and rub paint. If you live in a region with freezing temperatures, use cords and lights rated for low temperatures and ensure that waterproof grommets seal all entry points. Consider temporary designs for winter when access or door operation might be limited by snow buildup. Weather awareness reduces maintenance and helps your display stay looking fresh throughout the season.
Securing decorations to prevent damage during door operation
The biggest risk is a decoration snagging on moving parts. Keep all designs at least several inches away from tracks and springs, and avoid anything that can shift and jam the door as it opens or closes. Use flexible cords and avoid rigid metal fixtures that can bend under pressure. When possible, place heavy accents lower on the door frame where they’re less likely to be struck by a door edge. Regularly verify that all connections remain tight after wind or traffic. A careful approach protects both your door and your decorations for the entire season.
Maintenance and post-season care
After the holidays, remove decorations in the reverse order of installation to minimize stress on the door and weather seal. Dry any damp components before storage and coil cords neatly to prevent tangling. Inspect for any paint chipping or surface damage and address it promptly to prevent rust. Clean drains, grommets, and outlets to prevent moisture buildup. Label storage containers by date and content so you can reuse favored pieces next year. Proper maintenance extends the life of both your decor and your garage door hardware.
Cost considerations and budgeting tips
A wide range of decor options exists, from simple rope lighting to elaborate animated displays. To maximize impact without blowing your budget, start with a handful of high-impact pieces and fill in with cost-effective accents. Reuse durable outdoor-rated elements across multiple seasons, and shop off-season for deals. Consider energy costs by using LEDs and programmable timers to curb usage. A little planning can yield a festive display that’s affordable and durable enough to survive winter weather.
Accessibility and curb appeal impact
A well-executed garage door display adds seasonal curb appeal without compromising accessibility. Keep pathways clear and ensure the door’s movement remains unhindered. Use bright but not blinding lighting to guide visitors at dusk, and avoid overpowering the street with oversized props. A tasteful arrangement can become a signature element of your home exterior, inviting guests while maintaining a safe, functional entry. Always test your display at different times of day to ensure it looks balanced under varying daylight conditions.
AUTHORITY SOURCES
This guide draws on general safety and decoration best practices from credible sources. For safety standards and outdoor lighting guidelines, consult:
- https://www.cpsc.gov
- https://www.osha.gov
- https://extension.illinois.edu/
These sources provide overarching safety principles relevant to seasonal outdoor decorations and electrical installations.
Tools & Materials
- Outdoor-rated LED string lights (120V or 12V DC)(Choose weatherproof, IP-rated lights designed for exterior use.)
- Exterior-rated extension cords(GFCI-protected; avoid running across drive paths.)
- Weatherproof door hooks or clips(Use reusable, outdoor-rated mounting solutions.)
- Adhesive outdoor hooks (optional)(For smooth surfaces where clips won’t grip)
- Zip ties / cable ties (weather-resistant)(Secure loose strands; avoid over-tightening.)
- Weatherproof electrical tape or heat-shrink tubing(Seal any exposed connections against moisture.)
- Ladder or stable step stool(Ensure it is tall enough to reach the top corners safely.)
- Safety gloves(Protect hands during cutting and mounting.)
- Measuring tape(Plan spacing and symmetry precisely.)
- Cleaning supplies (alcohol wipes or spray)(Clean surfaces to improve adhesive grip if needed.)
- Utility knife or scissors(Trim cords and decorative elements as needed.)
- Timer or smart plug(Automate lighting to save energy and time.)
Steps
Estimated time: 60-120 minutes
- 1
Plan your design
Define your mood, colors, and focal points. Create a rough layout that avoids door hardware and tracks. Decide whether to use a timer and what hours the display should run.
Tip: Draft a simple sketch or digital mock-up to visualize spacing before purchasing decor. - 2
Prepare workspace and materials
Gather all materials in a dry, sheltered area. Organize lights by color and length, and test a small section of lights to confirm function.
Tip: Test lights indoors first to prevent seasonal delays. - 3
Clean door surface and inspect
Wipe down the door and inspect for chips, rust, or loose seals. Repair any damage before mounting to ensure a stable base for décor.
Tip: Moisture can reduce adhesion; dry thoroughly before sticking components. - 4
Mount exterior hooks or clips
Attach clips or hooks at evenly spaced points along the frame, avoiding hinges and sensors. Ensure they are level and secure.
Tip: Use a level if available to maintain symmetry across the door. - 5
Hang lights and decorations
Run cords along the frame and secure with zip ties. Place larger pieces first, then fill with accents for balance.
Tip: Work from bottom to top to distribute weight evenly. - 6
Secure and weatherproof connections
Seal all cord connections with weatherproof tape or shrink tubing. Mount outlets in sheltered areas if possible and use outdoor-rated cords.
Tip: Do not overload outlets; follow manufacturer max wattage. - 7
Test electricals and timers
Plug into a protected outlet and run a test at dusk. Check that the timer cycles correctly and that the door operates unobstructed.
Tip: Program the timer to turn on at civil twilight for optimal visibility. - 8
Store decorations after the season
Let everything dry before packing. Coil cords neatly and label storage containers for next year.
Tip: Store in a dry, sturdy bin to prevent moisture damage.
Got Questions?
Are outdoor-rated lights necessary for garage door decorations?
Yes. Outdoor-rated lights are designed to resist moisture and temperature changes, reducing risk of shock or short circuits.
Yes, use outdoor-rated lights to stay safe and prevent electrical issues.
How do I mount lights without damaging the door surface?
Choose clips or hooks designed for metal surfaces and avoid adhesives that can pull paint. Regularly check mounts for wear.
Use clips or exterior hooks and avoid aggressive adhesive that could damage the door.
What about weather and snow during decorating?
Plan for moisture and wind. Use weatherproof hardware and remove or secure decorations during heavy snow.
Be mindful of rain and snow; secure or remove decorations during storms.
Can I decorate if I have a manual garage door?
Yes, but ensure the door can open and close freely without catching decorations. Use lightweight items near the base.
Yes, decorate carefully; ensure operation isn’t hindered.
How long should a garage door display stay up?
Typically the holiday season; remove after the holidays to avoid weather wear and to protect the door hardware.
Keep it up through the season, then remove for maintenance.
How should I store decorations after the season?
Dry everything thoroughly, coil cords, and store in labeled containers to simplify next year’s setup.
Dry, coil, label, and store in a dry place.
Watch Video
Quick Summary
- Plan first, then decorate for safety and efficiency
- Use outdoor-rated components and weatherproofing
- Mount with proper hardware to protect door function
- Test display before peak usage and store responsibly
- Check local safety guidelines for electrical decorations