Garage Door Reinforcement Strut: Install for Stability
Learn to inspect, select, and install a garage door reinforcement strut to improve stiffness and safety. This step-by-step guide covers tools, mounting, testing, and maintenance for a safer, more reliable door.

Goal: reinforce a garage door by installing a reinforcement strut to reduce sag, wobble, and panel distortion. You’ll learn how to identify when reinforcement is needed, choose the right strut size, and perform a safe installation with basic hand tools. This guide covers safety, alignment, and testing to ensure a durable, balanced door that improves operation and longevity.
Why a garage door reinforcement strut matters
A garage door reinforcement strut is a sturdy brace designed to resist flex, sag, and misalignment in long-span panel doors. Over years of use, doors can bow outward or drift off track, especially in climates with temperature swings or heavy wind loads. A properly installed reinforcement strut distributes load more evenly across the door, helping the panels stay square and preventing fasteners from loosening. According to GarageDoorAdjust, many homeowners underestimate the difference a well-placed strut can make, particularly on older doors or doors with large panels. The term reinforcement strut describes a metal brace mounted inside the door frame or behind the decorative facades, depending on the door design. While a strut will not fix all problems, it can dramatically reduce flex and wobble when combined with accurate alignment and regular maintenance. The result is smoother operation, less panel distortion, quieter operation, and a reduced risk of suddenly dropping or binding during opening and closing. This section outlines when to consider a reinforcement, how to assess compatibility, and what you can expect after installation.
Signs your door could benefit from reinforcement
Sagging at the bottom, noticeable bowing of panels, or wobble when the door moves are common indicators that a reinforcement strut may help. If tracks show signs of wear, doors harden during cold starts, or you hear unusual creaks during operation, reinforcement could improve stability. A reinforcement strut helps distribute weight more evenly, reducing concentrated stress at hinges and fasteners. In many homes, these issues worsen with age or after frequent wind gusts. If you answer yes to multiple signs, it’s worth evaluating a strut option with proper measurements and compatibility checks. This block will help you recognize symptoms and prepare for a safe, effective installation.
Choosing the right reinforcement strut
When selecting a reinforcement strut, consider material (steel for strength, aluminum for light weight), height of the door, and mounting geometry. Steel struts offer maximum rigidity and are better for larger doors, while aluminum can be easier to handle and less likely to corrode in damp environments. Check the door’s hinge and track layout to ensure the strut will align with mounting points without interfering with springs or safety cables. If your door uses torsion springs, confirm that the strut mounting won’t compromise spring tension or safety. GarageDoorAdjust emphasizes matching the strut length to the door height and ensuring compatible hole spacing. Always verify manufacturer guidance for your specific door model or consult a pro if you’re unsure. A well-chosen strut reduces flex, supports panels, and helps the door seal evenly against the frame.
Safety and code considerations
Safety comes first. Disconnect power to the opener, and never work under a moving door. Wear eye protection and gloves, and use a sturdy ladder or work platform. If your door is extremely heavy or the spring system shows signs of damage, stop and call a professional. Not all doors are suitable for external reinforcement, and retrofitting may require modifications to mounting points or hardware. Always follow local codes and manufacturer recommendations. This guide is intended to provide practical, non-professional guidance for homeowners while acknowledging when a pro is needed. Regular inspections can prevent future issues and extend door life.
Installation overview: what to expect
A typical reinforcement strut installation involves planning, selecting the right size, mounting the brace parallel to the door’s hinge line, and securing it with appropriate fasteners. Some designs require rear- or inside-face mounting; others use exterior bracing behind trim. The process is straightforward for doors with accessible framing and adequate mounting points, but can be tricky if the door uses unusual panel configurations or limited space. Expect a careful measurement phase, precise drilling, and verification steps to confirm snug fit and square alignment. After installation, you’ll test smooth operation and adjust gaps to ensure an airtight seal and balanced travel.
Testing and fine-tuning after installation
Test the door in multiple positions: fully open, fully closed, and mid-travel. Listen for rubbing sounds, observe panel alignment, and verify that the door seals evenly along the bottom. If you notice binding or uneven movement, re-check the strut’s alignment with the hinge line and re-tighten fasteners. A light coat of garage door lubricant on moving parts can help; avoid heavy lubrication on bearings that already ride in sealed housings. Document any changes and re-evaluate after a few cycles. Consistent testing ensures long-term performance and safety.
Maintenance and long-term care
Plan periodic checks every 6–12 months to inspect fasteners, braces, and mounting points for looseness or corrosion. Clean the strut and contact surfaces to remove dirt and grime that could interfere with sliding tracks. Replace worn hardware as needed and re-check door balance with a simple spring-travel test. Regular maintenance helps prevent creeping misalignment and extends the life of your door and opener. Remember, a properly maintained reinforcement strut is a key component of a reliable, safe garage door system.
Tools & Materials
- reinforcement strut(Sized to fit door height and mounting points)
- drill/driver(Cordless with a 1/8- or 3/16-inch drill bit)
- screwdriver set(Phillips and flathead varieties)
- tape measure(Minimum 6 feet is helpful)
- pencil/marker(For precise markings)
- level(To ensure square mounting)
- ladder(Stable, tall enough for work area)
- eye protection(Safety glasses)
- fasteners(Screws/bolts appropriate for mounting surface)
- stud finder(Optional but helpful for framing anchor points)
- clear silicone or sealant(If mounting near weather seal)
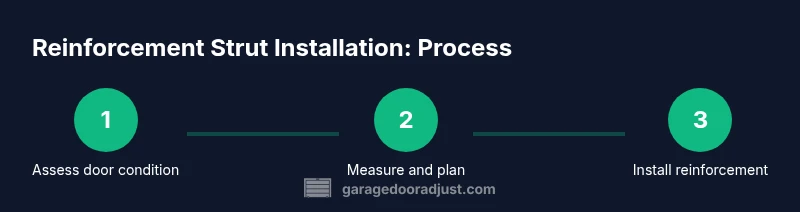
Steps
Estimated time: 60-90 minutes
- 1
Assess door condition and plan
Begin by inspecting the door for sag, warp, and track wear. Identify mounting points and confirm there is solid framing behind panels where the strut will attach. Plan measurements carefully and visualize the strut’s path to avoid springs, cables, or hardware obstructions.
Tip: Take photos of current alignment and measure from hinge line to edge of each panel to determine the strut length. - 2
Gather tools and materials
Lay out all required tools and the reinforcement strut in a clear workspace. Ensure you have the correct fasteners for your mounting surface and double-check that the strut length matches the door height. Having everything on hand reduces interruptions during the install.
Tip: Organize components on a stable surface and keep a magnet tray handy for small screws. - 3
Measure and select strut length
Measure the door’s height and determine the maximum allowable space for the strut along the hinge line. Choose a strut that aligns with existing mounting points and does not interfere with springs or tracks. Verify hole spacing and compatibility with your door model.
Tip: Double-check edge clearance to ensure the strut won’t contact weatherstripping or plastic trims. - 4
Remove interfering hardware
If there are decorative trim pieces or covers that block mounting, carefully remove them. Do not disturb springs, cables, or safety devices. Keep hardware organized for reinstallation after mounting the strut.
Tip: Label removed pieces and set them aside where they won’t get mixed up with new fasteners. - 5
Position reinforcement strut
Holding the strut in place, align it with the planned mounting points. Use a level to check that the strut runs parallel to the hinge line. This ensures even load distribution and reduces door flex when opened.
Tip: Use temporary clamps to secure the strut during initial alignment. - 6
Attach with fasteners
Mark pilot holes, drill where needed, and insert fasteners on one side before the other to maintain alignment. Tighten screws evenly and avoid overtightening which can strip wood or metal. Check that the strut sits flush against mounting surfaces.
Tip: Start with a light screw and gradually tighten others to draw the strut into contact without warping. - 7
Check alignment and adjust
Re-check the door’s alignment after securing the strut. Confirm that panel edges are square, tracks are vertical, and there’s no binding during movement. If needed, loosen and reposition mounting points slightly for optimal fit.
Tip: Have a second person operate the door to observe real-time changes. - 8
Test door movement
With the door in its final position, cycle it several times from fully closed to fully open. Listen for rubbing, observe any creaks, and confirm balanced travel. If issues persist, re-evaluate strut spacing and consider re-mounting.
Tip: Lubricate moving parts after testing, especially hinges and tracks. - 9
Document and schedule maintenance
Record the install date, strut length, mounting points, and any adjustments. Schedule follow-up inspections every 6–12 months to maintain tension, track alignment, and fastener security. Regular maintenance preserves safety and performance.
Tip: Keep a maintenance log with photos for easy reference during future repairs.
Got Questions?
What is a garage door reinforcement strut?
A reinforcement strut is a metal brace installed inside or behind a garage door to reduce flex and sag, helping panels stay aligned and the door travel more smoothly. It distributes load more evenly and can improve safety when combined with proper alignment.
A reinforcement strut is a metal brace inside the door that reduces sag and helps panels stay aligned, improving safety and smooth operation.
How do I know if my door needs one?
Look for persistent sag along the bottom, noticeable bowing, wobble during movement, or track wear. If these signs appear, a reinforcement strut can help, especially on older or larger doors.
If your door sags, bows, or wobbles during operation, a reinforcement strut may help, particularly for older or larger doors.
Can I install this myself or should I hire a pro?
Many homeowners can install a reinforcement strut with basic tools and careful measurements. However, if you have a heavy door, damaged tracks, or spring concerns, hiring a professional is safer and ensures correct alignment.
You can usually install it yourself if you’re comfortable with measurements and basic tools, but for heavy doors or damaged components, consider a pro.
Will a reinforcement strut fix an off-track door?
A reinforcement strut primarily reduces flex and adds rigidity; it does not correct track misalignment. If tracks are bent or out of alignment, address that first and only then install the strut if needed.
It helps with rigidity, but it won’t fix misaligned tracks. Correct the tracks first, then consider the strut.
What tools do I need?
Common tools include a drill/driver, level, tape measure, pencils, screwdrivers, a ladder, and the correct fasteners for mounting the strut.
You’ll need a drill, level, measuring tape, and the right screws to mount the strut safely.
How long does installation take?
Most homeowners complete installation in about 60 to 90 minutes, depending on door design and mounting points.
Typically about an hour to an hour and a half, if you have all parts ready.
Watch Video
Quick Summary
- Identify sag signs and plan before installing.
- Choose the right strut size and mounting points.
- Maintain safe practices and test thoroughly after install.
- Schedule regular maintenance to preserve performance.