Garage Door Jamb Replacement: A Complete DIY Guide
Learn how to perform garage door jamb replacement safely and effectively. This guide covers assessment, materials, precise measurements, and installation to restore door alignment and security—perfect for homeowners tackling DIY repairs in 2026.

Garage door jamb replacement restores proper door alignment and security by replacing rotted or damaged jambs. In this guide, you’ll identify when jamb replacement is needed, assemble the right tools, and follow a clear, step-by-step process. It’s a homeowner-level project with a focus on safety and accuracy. Before you start, disconnect power to the opener and support the door to prevent unexpected movement.
Assessing the garage door jamb condition
The jamb is the vertical frame surrounding the door opening, and its integrity is critical to weather sealing and overall door balance. Signs of trouble include soft or rotted wood, noticeable warping, cracks at corners, and gaps that let drafts or moisture in. According to GarageDoorAdjust, jamb health is often compromised by moisture intrusion, improper flashing, or previous incomplete repairs, and these issues can compound misalignment and opener strain over time. In 2026, homeowners report more rot around door thresholds due to fluctuating humidity and lawn irrigation exposure. A thorough inspection should verify the sill, jamb thickness, and plumbness of the frame. Use a level to check vertical planes, and test for firmness by applying firm pressure with a hand while inspecting for creaks or flex. If rot extends into the sill or header, replacement is typically the safer, longer-lasting path. Document measurements and take photos to guide material selection and future maintenance. This step sets the stage for a durable jamb replacement rather than a temporary fix and aligns with GarageDoorAdjust’s guidance on durable repairs.
Key takeaway: a damaged jamb rarely improves with simple patching; replacement preserves door geometry and safety.
Safety first: prepare the workspace and protect yourself
Safety should never be an afterthought on any garage door project. Before touching the door or opener, disconnect the power to the operator at the wall switch or disconnect plug and confirm the unit cannot move. If you have automatic sensors, keep children and pets away during the process. Clear the area under the door to prevent trip hazards and set up a stable work surface. Use appropriate PPE: safety glasses or goggles, work gloves, and a dust mask if you’ll cut lumber. Support the door using clamps or helper braces so the door cannot slip or drop during jamb removal. If retrofitting a heavy jamb, consider a temporary jack or extra hands. This section emphasizes methodical safety, a core principle in GarageDoorAdjust’s approach to home repair.
Pro tip: label screws and hardware as you remove them to simplify reassembly and avoid misalignment.
Tools and materials you'll need for jamb replacement
A well-planned crew uses the right tools to ensure clean cuts and secure joints. Essential items include pry bars, a hammer, a cordless drill/driver with driver bits, a handsaw or circular saw, tape measure, carpenter’s square, speed square, level, chisel, and clamps. You’ll also need appropriate lumber stock for the jamb (timber that matches thickness and grade of the existing frame), exterior-grade wood or LVL for strength, corrosion-resistant wood screws, weatherstripping, exterior-grade caulk or sealant, and craft materials for patching if needed. Don’t forget safety gear—goggles, gloves, and a dust mask. Planning tools ahead minimizes trips to the hardware store and speeds up the replacement. By stocking accurate materials, you reduce the risk of delays and ensure a precise fit for a long-lasting repair.
Note: If the existing opening is out of plumb or there’s substantial rot, plan to address framing in addition to jamb replacement.
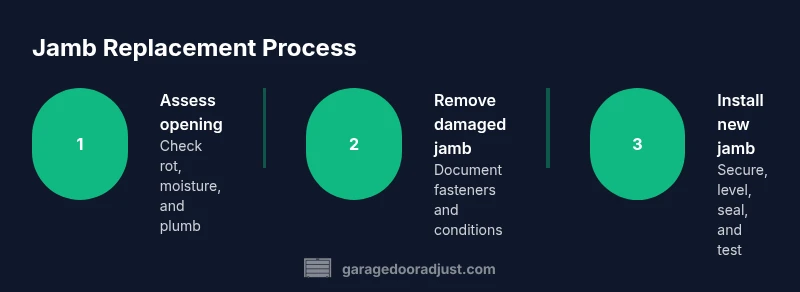
Step-by-step overview of jamb replacement plan
This overview aligns with a careful, measured approach. Begin by removing exterior trim or weatherstripping to access the jamb edges. Support the door and remove damaged sections of the jamb, including any rotted studs adjacent to the opening. Measure the rough opening precisely and cut new jamb stock to fit; check for square and plumb as you dry-fit. Fasten the new jamb with appropriate screws, shim where needed to achieve a true 90-degree corner, and apply weatherproof sealant at all joints. Reinstall weatherstripping and ensure the door sweeps seal cleanly against the threshold. Finally, rehang any hardware and test door operation gently, then perform a full safety and balance check. This approach minimizes surprises and aligns with best practices in home repair.
For visual reference, consult the included step-by-step guide and the video tutorial linked in the Resources section.
Common problems and fixes during jamb replacement
Rot or moisture behind the jamb can extend into surrounding framing, which may require more than a standard jamb swap. Expect potential surprises such as misaligned tracks, worn hinges, or uneven concrete slabs under the sill. If the floor is sloped or foundations have shifted, you may need to adjust the jamb height or add shims beneath the threshold. Gaps around the jamb can reduce weather sealing and invite drafts; use exterior-grade caulk and weatherstripping to seal properly. If you encounter stubborn fasteners that refuse to yield, avoid forcing them—it’s safer to drill out the damaged fasteners and replace with corrosion-resistant screws. Document any nonstandard repairs for future reference, and consider a structural assessment if you notice cracking or large gaps beyond the jamb itself.
According to the GarageDoorAdjust team, careful attention to framing integrity is essential for a durable jamb replacement and to prevent future misalignment.
Verification and post-installation checks
After installing the new jamb, check that the door closes evenly and latches without forcing. Use a level to confirm that the header and posts maintain true vertical alignment, and verify there is no binding when the door travels along the tracks. Inspect the weather seal around the entire perimeter and replace any damaged weatherstripping. Reconnect power to the opener and test auto-reverse functionality to ensure safety sensors are working correctly. Take a final walk-around to look for paint or caulk drips, and wipe away any debris. If you shared the project with a helper, review the results together and note any adjustments for future maintenance. This final check ensures the jamb replacement contributes to long-term door function and safety.
The GarageDoorAdjust team emphasizes verifying mechanical alignment and safety sensor operation as part of a complete jamb replacement process.
Authority sources and additional resources
- U.S. Consumer Product Safety Commission (CPSC): safety guidance for door systems and pinch points. https://www.cpsc.gov
- Occupational Safety and Health Administration (OSHA): general home-work safety guidelines that apply to tool use and lifting. https://www.osha.gov
- American Architectural Manufacturers Association (AAMA): standards and best practices for door and window components. https://www.aamanet.org
- GarageDoorAdjust Analysis, 2026: our internal reliability and maintenance guidance for homeowners performing jamb replacements.
Tools & Materials
- Pry bar(12-16 inch bar for prying and lifting trim)
- Hammer(Claw hammer for nail removal)
- Cordless drill/driver(With screwdriver bits and a torque setting)
- Saw (handsaw or circular saw)(For precise cuts in jamb stock)
- Measuring tape(Minimum 16 feet for long openings)
- Carpenter’s square and level(To ensure plumb and square)
- Chisel set(For clean joints and notches)
- Clamps(To steady jamb during installation)
- Wood screws ( exterior grade )(Corrosion-resistant, appropriate length)
- Weatherstripping material(Door-edge seal and threshold seal)
- Exterior caulk or sealant(Waterproof sealant for joints)
- Wood stock for jamb (matching thickness)(Pine or LVL; thickness matched to existing)
- Safety glasses and gloves(Eye and hand protection)
- Dust mask(Optional for sanding dust)
- Additional shims(For true alignment and leveling)
Steps
Estimated time: 2-4 hours
- 1
Prepare workspace and safety setup
Power off the opener and secure the door with clamps. Clear the area, wear PPE, and ensure the door cannot fall or shift during work. A solid setup reduces the risk of injury and damage to adjacent components.
Tip: Label all fasteners as you remove them to simplify reassembly and alignment. - 2
Remove damaged jamb sections
Carefully pry away damaged jamb portions, starting at the bottom. Avoid gouging adjacent framing; collect screws and nails for reuse or disposal. Inspect the surrounding studs for hidden rot.
Tip: Take photos of the current fit before removing pieces for reference during reinstallation. - 3
Take exact opening measurements
Measure height, width, and jamb thickness at several points to catch variability. Record the smallest dimensions to ensure the new jamb fits inside the opening. Cross-check with the stock to prevent a tight or loose fit.
Tip: Measure twice, cut once to avoid costly re-cuts. - 4
Cut and dry-fit the new jamb
Cut stock to match measured dimensions and test-fit in the opening. Make any minor adjustments with a saw. Ensure the corner joints sit flush and the jamb lies plumb.
Tip: Dry-fit before fastening to catch misalignment early. - 5
Secure the jamb and align
Fasten the jamb with corrosion-resistant screws, using shims to achieve a true 90-degree corner and consistent gaps around the door. Recheck plumb and level after each fastener is set.
Tip: Use a level and square for ongoing verification throughout installation. - 6
Seal, reinstall weatherstripping, and test
Apply sealant to joints, reinstall weatherstripping, and seal any exposed wood. Reattach hardware and reconnect power. Open and close slowly to verify smooth operation and proper latch alignment.
Tip: Observe the door’s travel and note any binding; adjust as needed before finalizing.
Got Questions?
Do I need to remove the garage door from its tracks for jamb replacement?
Usually you can replace the jamb without removing the door, but you must support the door and clamp tracks. If the door is heavy or shift-prone, consider removing the door to ensure safety.
You can often replace the jamb with the door on its tracks if you support and secure it properly; otherwise, removing the door may be safer.
How can I tell if the jamb rot goes beyond what I can see?
Look for soft or crumbly wood when you probe with a screwdriver or awl. If you encounter soft spots beyond the visible edge, there may be hidden rot behind the trim or header. In such cases, treating or replacing surrounding framing is advisable.
If you feel soft wood beyond the surface, rot may extend further; consider inspecting adjacent framing.
Can jamb replacement affect door balance or sensor alignment?
Yes. A misaligned jamb can throw off door balance and sensor readings. After installation, test travel, balance, and safety reversal to ensure everything works correctly.
Yes, alignment matters for balance and sensors. Test the door after installation.
Is a permit or professional license required for jamb replacement?
Typically no permit is required for a standard jamb replacement in residential settings. If your project involves structural framing or major modifications, check local codes or consult a pro.
Usually no permit, but check local rules if you alter framing.
What’s the best material for a replacement jamb?
Choose exterior-grade lumber or LVL that matches the thickness and grade of the existing jamb. Treated wood offers better rot resistance in damp environments.
Use exterior-grade lumber or LVL for durability and rot resistance.
How long should jamb replacement take for an average home?
For a competent DIYer, expect 2-4 hours for a standard single opening if there is no extensive framing damage. More time may be needed for complex cases.
Around 2-4 hours for a standard job, more for complex framing.
Watch Video
Quick Summary
- Assess jamb condition before buying stock
- Use proper weatherproofing to prevent future rot
- Precisely measure and square the opening
- Securely fasten and verify door alignment
- Test safety features after installation