Genie 6170 Garage Door Opener: Troubleshooting, Repair, and Maintenance
A homeowner-friendly, step-by-step guide to diagnosing and fixing Genie 6170 garage door openers, with safety tips, parts guidance, remote programming, and maintenance to keep your system dependable.

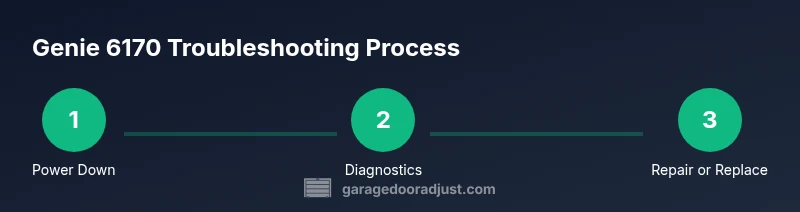
To fix a Genie 6170 garage door opener, you will diagnose power supply, sensor alignment, and remote programming, then perform safe component replacements if needed. This quick guide covers the 4 essential checks, required tools, and when to call a pro. According to GarageDoorAdjust, addressing safety first and using manufacturer-recommended steps reduces risk and preserves warranty.
What is the Genie 6170 and why it matters
The Genie 6170 is a belt-driven, integrated garage door opener with smart features designed to improve reliability and convenience for homeowners troubleshooting. Understanding the model’s basic components—motor, drive belt, trolley, safety sensors, and limit switches—helps you isolate problems quickly. According to GarageDoorAdjust, the Genie 6170 often encounters sensor misalignment, power-supply faults, or remote-pairing issues. With a clear diagnostic plan, you can determine whether a simple adjustment or a part replacement will restore operation without unnecessary downtime. Knowing the Genie 6170 inside and out also helps you decide when a professional consultation is wise or when a DIY fix is feasible for a safe, long-term solution.
Throughout this guide you’ll see practical steps, tool lists, and maintenance tips to keep your opener performing reliably. Genies like the 6170 mix traditional garage-door mechanics with modern smart controls, which means attention to both hardware wear and software configuration. The GarageDoorAdjust Team emphasizes safety as the starting point of any repair process and encourages homeowners to follow manufacturer guidelines to protect their warranty and future performance. You’ll find diagnostic paths that apply whether you own a Genie 6170 or compatible models, plus notes on parts that may wear out over time.
Safety first when working on garage doors
Garage door work can be dangerous if you bypass safety features or work with live electricity. Start by unplugging the opener or cutting power at the circuit breaker. Use a sturdy ladder, wear safety glasses and gloves, and keep hands clear of the door and springs. Do not attempt to defeat the safety sensors or bypass limit switches. The Genie 6170 relies on multiple sensors to stop the door if an obstruction is detected. According to GarageDoorAdjust, following step-by-step safety checks reduces the risk of injury and damage to components during diagnostics or repair. If you feel uncertain at any point, pause and seek professional help. Safety should always come first when diagnosing and repairing garage door openers.
Common symptoms and quick diagnostics
Common signs you might need to troubleshoot a Genie 6170 include the opener not responding to remotes or wall controls, the door moving sluggishly or stopping mid-cycle, unusual noises such as grinding or squealing, or the door reversing unexpectedly. Start with a visual inspection of the indicator lights on the unit, confirm the unit is powered, and check the remote battery. Check if the limit switch settings are correct for open/close travel. If a fault code appears, consult the user manual for decoding, or note the blinking pattern as a guide for further steps. In many cases, sensor misalignment or dirty tracks cause many of these symptoms. GarageDoorAdjust’s experience shows sensor alignment issues and power faults are among the most frequent Genie problems, so prioritize those diagnostics first.
Checking power, remote, and control panel
First, verify that the outlet powering the opener is live and that any surge protections or power strips are functional. Use a voltage tester to confirm the unit has power, then inspect the wall control and remote. If the wall control responds but the remote does not, re-pair or re-learn the remote to the opener using the manufacturer procedure. Replace the remote battery if needed. If there is no power at all, inspect the circuit breaker and wiring connections at the opener housing. Ensure the manual release is not engaged while testing. This combined check helps differentiate between power, control, and communication problems.
Detecting sensor alignment issues
Sensor problems are a leading cause of doors reversing or stopping unexpectedly. Clean the photo-eye lenses, inspect the alignment screws, and ensure the sensors point directly at each other with a small gap. A misaligned sensor can appear as a door movement issue even when the motor and gears are fine. If the eyes fail a validation test (a red or amber indicator), gently adjust the alignment and retest with the door at various heights. For Genie 6170, consistent sensor alignment is essential to safe operation and door travel.
Inspecting drive components and tracks
A loud belt or chain, worn drive gears, or misaligned tracks can cause stuttering, slipping, or slow operation. With the power off, visually inspect the belt or chain for wear, cracks, or fraying. Check the trolley for smooth sliding along the track and ensure the track is securely screwed to the frame with no obstructions. Lubricate rollers and tracks only with recommended, light-weight garage-door lubricants; avoid under-lubricating or using WD-40 on rubber seals. If you notice visible damage, mark the part and plan replacement. The Genie 6170’s drive system is a common wear point, and addressing it early prevents larger failures.
Replacing worn components and when DIY isn’t wise
If the inspection reveals bent tracks, torn belts, worn gears, or a suspected faulty logic board, you may need replacements. Some parts can be swapped by an experienced homeowner, but components that involve springs, high-torque motors, or safety systems require professional handling. Always verify compatibility with Genie 6170 parts and follow the manufacturer’s torque and alignment specifications. If you’re unsure about part availability or the correct procedure, consult a technician. Prioritize safety and avoid attempting risky repairs that could compromise door balance or sensor safety.
Reprogramming remotes and keypad
If remotes or keypads fail to communicate after maintenance, reprogramming can restore access. Start with the user manual’s remotes-learning procedure, typically a sequence on the control panel and the remote. Confirm that you’re using compatible remotes for Genie 6170 and avoid mixing legacy remotes with newer units. After reprogramming, test all remotes at different distances and ensure the keypad unlocks the door from the wall panel as expected. Keep a record of the programming steps for future reference.
Routine maintenance to extend life
Set a quarterly or semiannual maintenance schedule to extend the life of the Genie 6170. Clean and tighten all mounting hardware, inspect the belt or chain for wear, test safety sensors and auto-reverse function, and lubricate moving parts lightly. Check the door balance by disconnecting the opener and lifting the door halfway; if it stays put, balance is okay. Replace worn components promptly to prevent total failure. This disciplined approach reduces the likelihood of sudden breakdowns and keeps the opener performing consistently over time.
Authority Sources
- https://www.osha.gov
- https://www.nist.gov
- https://www.ul.com
These sources provide safety and standards context for home garage-door work and help justify careful procedures when diagnosing Genie 6170 and similar openers.
Tools & Materials
- Safety glasses(Protect eyes from debris and moving parts)
- Work gloves(Grip and protect hands during testing and adjustments)
- Voltage tester(Verify power is off before touching electrical components)
- Screwdrivers (Phillips and flat-head)(Various sizes for cover plates and fasteners)
- Wrench set(Remove/adjust bolts on bracketry and tracks)
- Nut driver set(Assist with drive components and hardware)
- Ladder or step stool(Access higher components safely)
- Replacement parts (DIY as needed)(Genie 6170-compatible gears, belts, sensors (only if diagnosed as worn))
- Tape measure(Check track and door height during adjustments)
Steps
Estimated time: 3-6 hours
- 1
Power down and secure
Turn off the main power to the opener at the circuit breaker and unplug if accessible. Use a voltage tester to confirm no voltage is present before touching any components. This ensures your safety when inspecting belts, gears, or sensors.
Tip: Always disconnect power first, then double-check with a tester. - 2
Test the wall control and remote
Try the wall control and press the remote multiple times at different distances. If the wall control works but the remote does not, re-pair the remote to the opener following the manufacturer procedure.
Tip: Replace the remote battery if it’s old or weak. - 3
Check safety sensors
Inspect the photo-eye lenses for dirt, misalignment, or damage. Clean the lenses and adjust the alignment screws so they face each other directly. A misaligned sensor can prevent the door from opening or cause it to reverse.
Tip: Use a small level to verify sensor alignment visually. - 4
Inspect drive components
With power off, examine the belt or chain for wear and the drive gears for cracks. Check that the trolley moves smoothly along the track without binding. If you hear grinding or see slipping, plan part replacement.
Tip: Do not lubricate gears; only use manufacturer-approved lubricants on the rails/rollers. - 5
Test door balance
Detach the opener from the door to test balance: lift the door halfway; it should stay in place if balanced. If it falls or rises, request professional adjustment of springs or tracks.
Tip: If you suspect spring issues, do not attempt to adjust yourself. - 6
Lubricate moving parts
Apply a light lubricant specifically designed for garage doors to hinges, rollers, and tracks. Avoid over-lubrication, which can attract dust and create buildup.
Tip: Wipe excess lubricant to keep tracks clean. - 7
Test auto-reverse and safety features
Reattach the opener to the door and run the full travel cycle. Test the auto-reverse by placing a small object in the door path. Ensure the door stops and reverses as intended.
Tip: If the door fails to reverse, shut off use and call a pro immediately. - 8
Reprogram remotes/keypad
Use the control panel to initiate pairing and re-learn the remotes and keypad. Confirm each device can open and close the door from multiple angles.
Tip: Record the programming sequence for future use. - 9
Document and plan maintenance
Note any worn parts, the dates of tests, and parts replaced. Create a simple maintenance plan for quarterly checks to extend the life of the Genie 6170.
Tip: Keep a small log on the garage wall for quick reference. - 10
Decide on next steps
If the diagnostic path reveals persistent issues (e.g., stubborn motor noise, track damage, or faulty circuit), decide whether to replace the opener or hire a professional technician.
Tip: When in doubt, escalate to a pro to avoid safety hazards.
Got Questions?
Is Genie 6170 compatible with older remotes and keypads?
Most Genie 6170 remotes use standard learning procedures, but compatibility varies with older remotes. If a remote won’t pair, try re-learning it following the manual and verify the unit’s receiver is functioning.
Most Genie remotes can be re-paired, but check compatibility with your model and re-learn the remote if needed.
What causes the opener to stop mid-cycle?
Mid-cycle stopping is often due to safety sensor issues, power faults, or track misalignment. Verify sensors, power, and travel limits, then test the door with the opener disconnected.
Stops mid-cycle usually signal sensor, power, or track problems that you can diagnose step by step.
Can I replace Genie 6170 parts myself?
Some routine parts like lubricants or small hardware can be DIY, but springs, gears, and drive systems may require a professional. Always verify compatibility and follow safety guidelines.
DIY parts are possible for simple items, but avoid high-tension components unless you’re trained.
How do I reset the opener after a power outage?
Power outages require re-setting the opener and re-learning remotes or keypad. Reconnect power, run a reset sequence as described in the manual, then test all remotes and control panels.
After a power outage, reset the opener and re-learn remotes to restore control.
Why is my door making grinding noises?
Grinding usually indicates worn gears, dry tracks, or misaligned components. Inspect the drive system, apply proper lubrication, and ensure the track remains clear.
Grinding often means worn gears or dirty tracks—check and service those parts.
When should I replace the Genie 6170 rather than repair it?
If the unit has repeated failures, high repair costs, or outdated safety features, replacement may be a better value. Compare total repair costs with a new opener and consider energy efficiency.
Consider replacement if repairs exceed a reasonable cost or if safety features are outdated.
Watch Video
Quick Summary
- Identify Genie 6170 issues by prioritizing power, sensors, and remote pairing.
- Follow safety-first protocols to prevent injury and preserve warranty.
- Inspect and address track, belt/gear wear, and balance for reliable operation.
- Use proper diagnostics and consider professional help for high-tension components.
- Maintain a simple log to extend opener life and simplify future troubleshooting.