How to Make Garage Doors Look Like Wood: A Practical Guide
Learn proven methods to give your garage door a wood-grain appearance without traditional wood. This step-by-step guide covers paints, overlays, and maintenance for durable, authentic-looking results.

You can make a garage door look like wood by choosing a wood-look method (paint with grain, vinyl overlays, or embossed fiberglass/steel), then properly prepping the surface, applying a convincing grain pattern, and sealing for durability. This approach balances cost, maintenance, and curb appeal. According to GarageDoorAdjust, wood-look finishes read as authentic when grain patterns vary and color tones mirror real wood.
Why wood-look finishes are popular
Wood look finishes have a warmth and texture that real wood doors offer, but with far less upkeep and cost. For many homeowners, a wood-grain appearance on a steel or fiberglass door delivers curb appeal without the risk of warping or rot. A convincing wood look can also increase perceived value and complement traditional or modern architectural styles. When learning how to make garage doors look like wood, the key is to select a method that aligns with climate, durability needs, and maintenance willingness. In practice, you’ll weigh options such as painted grain with a glaze, vinyl overlays, and embossed doors with wood-grain textures. The most convincing results blend subtle grain variation, authentic color tones, and consistent finish layers.
According to GarageDoorAdjust, wood-look finishes are most convincing when grain patterns are varied and color tones mimic real wood. Subtle imperfections, knots, and irregular grain help avoid a flat appearance and read as authentic in outdoor lighting.
Materials that mimic wood convincingly
Convincing wood-look finishes rely on a few dependable approaches. Painted grain uses a base coat with a glaze or oil-based stain to simulate grain texture. Vinyl overlays provide a durable, low-maintenance option that adheres to metal or fiberglass doors and can mimic oak, pine, or walnut tones. Embossed steel or fiberglass doors already come with grain patterns—these can be enhanced with a glaze technique to deepen the “wood” look without changing the door core. For best results, match the method to your door material and climate, and test color samples on a hidden area first. Keep in mind that some finishes stand up better to sun and moisture; your home’s orientation and local weather will influence longevity. GarageDoorAdjust Analysis, 2026, notes that coatings with UV protection typically perform longer in bright sun exposures.
Other options include laminated wood-look panels for a full replacement feel, or vinyl wrap kits that cover the door surface with a printed grain texture. Each method has trade-offs between realism, weight, installation difficulty, and cost. Choosing a method that complements your house style and local climate is essential for a durable, authentic look.
Prep work for your door
Preparation is the foundation of a lasting wood-look finish. Start by cleaning the door surface to remove oil, dirt, and dust; degreasing with a mild detergent helps paint adhesion. If your door is glossy or smooth, light sanding with 120–180 grit sandpaper creates a key for coatings to grip. Remove or protect hardware and weatherstripping, then mask edges and adjacent walls with painter’s tape. If you’re applying an overlay, ensure the door surface is clean and dry; moisture can cause failures in adhesive layers. Finally, choose a dry, mild day for the project to prevent moisture from impacting cure times.
Ventilation is important when painting, so plan work days when doors won’t be exposed to rain. Reseal or protect any areas that aren’t part of the finish.
Painting vs staining vs decals: choosing the right approach
Painting with a grain glaze is versatile and relatively affordable, but it requires skill to mimic natural grain. Staining is less common on metal doors since the grain can look uneven, but it works well on wood or composite doors. Vinyl overlays and decals offer quick, durable wood-look options with less maintenance, though they can be more expensive upfront. The best choice depends on your door material, climate, budget, and DIY confidence. For higher durability in sunny climates, look for UV-stable paints or overlays. If you want a traditional wood tone, pick a color palette with warm browns and subtle nereutral grays to avoid a plasticky look.
Faux-wood grain painting technique overview
The classic faux-wood grain technique combines a base color with a glaze and a grain tool to create natural-looking lines. Start with a solid base coat, allow it to dry completely, and then apply a dark glaze in a controlled, random pattern. Use a wood-graining tool (a comb-like stamp or a specialized graining rocker) to pull grain patterns across the surface, varying pressure to create width differences. Layer a lighter glaze over the grain to highlight knots and subtle variations. Finish with a clear protective topcoat that suits exterior exposure. Patience is key—allow each coat to cure fully before applying the next to prevent smudging.
Using vinyl overlays or fiberglass doors for wood look
Vinyl overlays are a practical option when you want a fast, durable transformation. They come in wood-grain finishes and can be trimmed to fit most standard doors. For a more permanent solution, consider fiberglass doors with embossed grain patterns that mimic real wood. The advantage of overlays is minimal maintenance; the downside is cost and potential wear at edges. When selecting overlays, verify adhesive compatibility with your door material and check warranty implications—some overlays may affect warranty terms. For a seamless result, order a finish that matches your home’s architectural style and coordinate with existing trim colors.
Maintenance tips to keep the look fresh
Wood-look finishes require periodic care to preserve realism. Clean with a soft cloth and mild soap; avoid harsh solvents that can dull the grain. Inspect seals and paint edges annually and touch up as needed to prevent moisture intrusion. Reapply topcoat every few years or when you notice wear in high-traffic areas. If you chose an overlay, follow the manufacturer’s care instructions, since some finishes tolerate cleaning solutions better than others. Regular maintenance helps hairline cracks and peeling from developing into broader issues that compromise both appearance and door function.
Cost considerations and time estimates
Wood-look finishes vary in price and effort, from DIY grain painting to professional vinyl overlays or full door replacements. A DIY approach generally costs less upfront but requires time, skills, and proper tools. Vinyl overlays are typically more expensive but offer good durability and weather resistance with low maintenance. Replacing the door with a wood-look fiberglass or steel option can be a higher upfront investment but may reduce long-term maintenance. When planning, factor in curing times between coats and the potential for weather delays. A realistic timeline can span several days, especially if multiple coats are required.
Safety and warranty considerations
Working on a garage door involves moving parts and power tools. Always disconnect any door activators before starting prep or painting to prevent accidental opening. Use eye protection, gloves, and a mask when sanding or spraying, and ensure proper ventilation. Some finishes may affect warranty terms, especially if applied to hardware or the door’s structural components. Check with the door manufacturer and any overlay suppliers about compatibility and warranty impact before beginning. If your door is old or damaged, consult a professional to avoid injury or further deterioration.
Tools & Materials
- Safety gear (gloves, goggles, mask)(Protect eyes, skin, and lungs from dust and fumes)
- Soap and degreaser(Clean surface before painting or applying overlays)
- Soft cloths and tack cloth(Remove dust before finishing)
- Painter’s tape and drop cloths(Protect surrounding surfaces)
- Medium-grit sandpaper (120-180)(Key glossy surfaces for better adhesion)
- Primer (if painting)(Select exterior-grade primer for metal or fiberglass)
- Wood-grain glaze or stain(Choose UV-resistant exterior product)
- Basecoat paint (exterior)(Earthy browns or warm neutrals)
- Wood-graining tool (comb or rocker)(Gives natural grain texture)
- Clear topcoat (exterior)(UV-resistant sealant)
- Vinyl overlay kit (optional)(For a ready-made wood-look finish)
- Nylon/foam rollers and angled brushes(Even coating and grain detail)
- Lint-free cloths and mild cleaner(Touch-ups and cleanup)
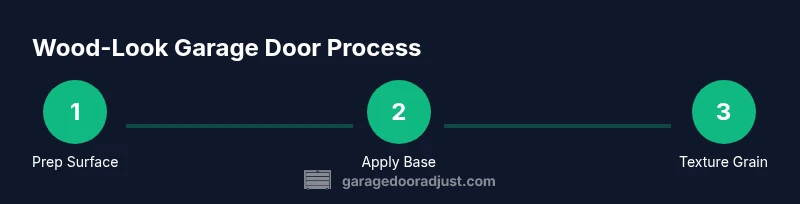
Steps
Estimated time: 6-12 hours active work; plus 24-48 hours curing time between coats if needed
- 1
Prepare surface
Remove or protect hardware, wash the door, and mask edges and surrounding surfaces. Ensure the door is dry before starting. This prevents adhesion issues and ensures a clean grain pattern.
Tip: Use a degreaser for oily residues that can hinder paint adhesion. - 2
Sand glossy areas
Lightly sand any glossy panels with 120-180 grit to create a key for the finish. Wipe away dust with a tack cloth before proceeding.
Tip: Focus on corners and raised grain areas to avoid feathering. - 3
Apply primer (if painting)
Apply exterior primer to metal or fiberglass doors if you’re painting. Let it dry fully per product instructions before applying color.
Tip: Use an exterior-grade primer to improve pigment uptake. - 4
Base coat application
Paint the base color evenly across the door using a roller. Apply thin coats and let each coat dry completely to avoid running the glaze.
Tip: Choose a warm neutral base that complements your home’s exterior. - 5
Apply grain glaze
Dip your brush into the glaze and apply in horizontal strokes. Tilt the brush to create occasional wider grain sections.
Tip: Keep the glaze damp and work quickly to blend edges. - 6
Create wood grain texture
Use a wood-graining tool to pull grain lines across the door. Vary pressure to simulate natural grain width; repeat across panels.
Tip: Undertone lighter areas with a lighter glaze to mimic sun exposure. - 7
Highlight knots and features
Dab a lighter shade or dry-brush lighter tones to highlight knots and natural imperfections.
Tip: Avoid overdoing highlights; subtle variation reads more authentic. - 8
Seal the finish
Apply a clear exterior topcoat to protect the grain pattern from UV and moisture. Allow sufficient curing time between coats.
Tip: Test a small area first to ensure finish compatibility. - 9
Reinstall hardware and clean up
Reattach handles, weatherstripping, and any components removed at the start. Clean tools and store properly.
Tip: Ensure weatherstripping sits flush to maintain seal.
Got Questions?
Can I apply a wood-look finish to a metal garage door?
Yes, but preparation matters. Use a metal-friendly primer, ensure a clean, dry surface, and choose a UV-resistant topcoat to prevent peeling. Follow manufacturer guidelines for adhesion on metal surfaces.
Yes. Start with cleaning and priming a metal door, then apply a wood-look topcoat designed for metal and UV protection.
Will faux-wood finishes hold up in humid climates?
Durability depends on the chosen product and proper sealing. UV-rated finishes and moisture-resistant coatings tend to perform better in humidity. Regular maintenance helps prevent peeling and color fade.
Durability depends on the product; pick UV-rated finishes and seal well, then maintain regularly.
How long does it take to complete a wood-look finish?
Expect several days including dry and cure times for coatings and any overlays. Active work may span 6-12 hours, with additional days for multiple coats and curing.
Plan for several days total, with multiple coats and cure time between steps.
Should I remove the door from its tracks for this project?
Not always necessary. Many DIY wood-look projects can be done with the door in place if you protect surrounding areas and work safely. For heavy doors or overlays, removing the door may reduce risk and improve access.
You can often work with the door in place; only remove if you have the right equipment and space.
Can I revert to the original look if I don’t like the finish?
Yes, you can generally revert by repainting with a solid base color or removing the overlay if installed with removable adhesive. Expect some edge wear where layers were applied.
Yes, you can revert with repainting or removing overlays, but expect some edge wear in the process.
Watch Video
Quick Summary
- Choose a wood-look method that suits your climate and budget.
- Prep surface thoroughly for a lasting grain illusion.
- Texture grain patterns with approved tools for realism.
- Finish with UV-protective sealant to protect color and texture.